If you have just installed WooCommerce, the Settings panel can feel overwhelming. There are eight tabs, dozens of options, and a lot of unfamiliar terminology. This guide walks you through every single setting in the WooCommerce dashboard – what each option does, when to change the default, and which mistakes to avoid as a beginner.
How to Access WooCommerce Settings
From your WordPress admin panel, go to WooCommerce > Settings. You will see eight tabs across the top: General, Products, Tax, Shipping, Payments, Accounts & Privacy, Emails, and Advanced. Each tab controls a specific part of your store. We will go through all of them in order. If you are just getting started with WordPress e-commerce, read our WordPress e-commerce setup guide for non-developers first to make sure WooCommerce is installed correctly.
Tab 1: General Settings
The General tab handles your store’s core identity – where it is located, what currencies it uses, and which countries it sells to.
Store Address
Enter your real business address here. WooCommerce uses this to calculate taxes and shipping rates. If you leave it blank or enter a wrong address, your automatic tax and shipping calculations will be inaccurate. Even if you sell digital products, fill in a valid address – it appears on invoices and affects tax compliance.
Selling Location(s)
This controls which countries your store accepts orders from. The options are:
- Sell to all countries – default, open to everyone worldwide
- Sell to all countries, except for… – exclude specific markets (useful for export restrictions)
- Sell to specific countries – whitelist only the markets you serve
For new stores, start with “Sell to all countries” unless you have a specific legal or logistical reason to restrict. You can always narrow this down later.
Shipping Location(s)
Separate from selling locations, this setting controls where you physically ship products. You might sell globally but only ship to certain regions. This distinction matters for stores with physical goods.
Default Customer Location
This tells WooCommerce how to calculate taxes and shipping costs before a customer enters their address. Options:
| Option | Best For | Notes |
|---|---|---|
| No location by default | Physical goods, variable shipping | Customers see no shipping cost until they enter their address |
| Shop base address | Local-only stores | Assumes every customer is near you |
| Geolocate | Tax-accurate stores | Uses IP lookup to estimate location |
| Geolocate (with page caching support) | Cached sites with geolocation needs | Stores location in a cookie – works with caching plugins |
If you use a caching plugin like WP Rocket or W3 Total Cache, choose the last option. Regular geolocation breaks on cached pages.
Enable Taxes
Check this box if your products are taxable. Once enabled, a Tax tab appears in Settings. If you are selling digital services in the EU, enabling taxes is legally required. If you are a sole trader below the VAT threshold in your country, you might leave it off for now.
Enable Coupons
Enabled by default. This adds a coupon code field at checkout. Disable it if you never plan to run promotions – removing the field can slightly speed up checkout and reduce distraction for customers.
Currency Settings
Set your store currency, the position of the currency symbol (before or after the number), thousands separator, decimal separator, and number of decimals. Most stores use two decimals. If you sell high-volume low-price items (like app purchases), you might drop to zero. Common mistake: setting the wrong currency at launch and then changing it later – WooCommerce does not convert existing order totals when you switch currencies.
Tab 2: Products Settings
The Products tab controls how your shop page and individual product pages behave, along with inventory and downloadable product settings.
Shop Page
This dropdown links your WooCommerce shop to a WordPress page. By default it is set to the “Shop” page that WooCommerce creates on install. Do not delete this page – it is what drives your /shop URL. If you accidentally delete it, create a new page and select it here.
Add to Cart Behaviour
Two checkboxes:
- Redirect to the cart page after successful addition – forces customers to the cart every time they add something. Good for single-product stores, bad for multi-product browsing.
- Enable AJAX add to cart buttons on archives – lets customers add items from the shop listing page without a page reload. Leave this on for better UX.
Placeholder Image
This is the fallback image shown when a product has no image. Upload a branded placeholder rather than using the grey WooCommerce box – it looks more professional.
Measurements – Weight and Dimensions
Set your default units for weight (kg, g, lbs, oz) and dimensions (cm, mm, in, yd, m). This matters for shipping rate calculations. Whatever you choose, stay consistent – changing units later does not auto-convert existing product data.
Reviews
Control whether product reviews are enabled, whether reviewers must have purchased the product, and whether star ratings are shown. Verified reviews improve trust. If you are just starting out, enabling reviews from day one helps you build social proof early.
Inventory
The inventory section controls stock management:
| Setting | What It Does | Recommendation |
|---|---|---|
| Enable stock management | Tracks quantity and auto-marks sold-out items | Enable if you have finite stock |
| Hold stock (minutes) | Reserves stock during checkout | Default 60 min is fine; lower for high-demand items |
| Notifications | Emails admin when stock is low or out | Always enable both |
| Low stock threshold | Triggers the low stock email | Set to your reorder point |
| Out of stock threshold | When a product auto-sets to out of stock | Default 0 is correct for most stores |
| Out of stock visibility | Hide or show sold-out items on shop | Hide to avoid buyer frustration |
| Stock display format | Shows “12 in stock” vs just “In stock” | Show quantity for urgency; hide for privacy |
Downloadable Products
If you sell digital files, this section controls how they are delivered:
- File download method: Force downloads (secure, file served by PHP), X-Accel-Redirect (fast, server-level), or Redirect only (simple, but exposes file URL). For most hosts, “Force downloads” is the safest starting point.
- Access restriction: Require login and/or limit downloads to the purchasing account only. Enable both for paid products to prevent link sharing.
- Open in browser: Enable for PDFs and ebooks so customers can read in the browser; disable for software files.
Tab 3: Tax Settings
This tab only appears after you enable taxes in the General tab. Tax rules vary by country, state, and product type, so this section is more about structure than one-size-fits-all settings.
Prices Entered With Tax
This is one of the most important tax decisions you will make:
- Yes, I will enter prices inclusive of tax – your product price already includes tax. The price customers see is the price they pay. Common in B2C markets (EU, UK).
- No, I will enter prices exclusive of tax – tax is added on top at checkout. Common in B2B and US markets.
This setting affects every product price in your store. Changing it after adding products does not recalculate existing prices. Decide before you add your first product.
Calculate Tax Based On
Choose whether tax is calculated based on the customer’s shipping address, billing address, or your shop’s base address. For most countries, shipping address is correct for physical goods. Some digital goods follow billing address rules.
Shipping Tax Class
Controls how shipping costs are taxed. Options are “Shipping tax class based on cart items” (applies the highest tax rate in the cart to shipping) or a specific tax class. Check your local tax laws – in many jurisdictions, shipping is taxable at the same rate as the goods being shipped.
Rounding
WooCommerce can round tax at the subtotal level or per line item. Rounding per line item is more accurate for large orders with many different products.
Additional Tax Classes
By default you get Standard, Reduced Rate, and Zero Rate tax classes. You can add custom classes here (for example, “Digital Services” at a different rate). Once created, go to the Tax Rates sub-tabs to enter the actual percentages per country/state.
Display Settings
Control whether prices on the shop page, cart, and checkout show tax inclusive or exclusive amounts, and whether to display a tax suffix (like “inc. VAT” or “excl. VAT”) next to prices. For B2C stores, show prices inclusive and add “inc. VAT” for transparency. For B2B, show exclusive prices with an “excl. tax” note.
Tax settings are the one area where getting expert advice pays off. A $50 consultation with a local accountant can save you from months of incorrect tax collection.
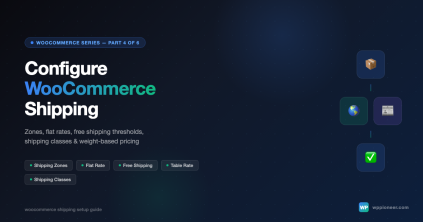
Tab 4: Shipping Settings
The Shipping tab is where you define shipping zones, rates, and options. Getting this right is critical – bad shipping settings are one of the top causes of cart abandonment.
Shipping Zones
A shipping zone is a geographic region (country, state, or postcode range) with its own set of shipping methods. For example, you might have:
- Zone 1: United States – Flat rate $5, Free shipping over $50
- Zone 2: Europe – Flat rate $15
- Zone 3: Rest of World – Flat rate $25
Orders go to the first matching zone. Always create a “Rest of World” zone as a catch-all at the bottom of the list, or international customers will see no shipping options at checkout and abandon.
Shipping Methods
Within each zone, you add shipping methods. WooCommerce includes three built-in methods:
| Method | Use Case | Key Setting |
|---|---|---|
| Flat rate | Fixed cost per order or item | Set cost, optional per-item extra |
| Free shipping | Promotional or threshold-based free delivery | Requires a minimum order, coupon, or both |
| Local pickup | Click-and-collect from your address | Set a cost (or 0 for free pickup) |
For real-time carrier rates (UPS, FedEx, USPS, DHL), you need the WooCommerce Shipping plugin or carrier-specific extensions. These pull live rates from the carrier API based on weight, dimensions, and destination.
Shipping Options
Below the zones, the Shipping Options sub-tab has two important settings:
- Enable shipping calculator on cart page: Lets customers estimate shipping before checkout. Keep this on – it reduces abandoned carts caused by shipping cost surprises at checkout.
- Hide shipping costs until an address is entered: Useful if your shipping costs vary significantly. Stops customers from making incorrect assumptions about rates.
Shipping Classes
Shipping classes let you charge different rates for different product types within the same zone. For example, “Heavy items” at $10 extra and “Standard items” at flat rate. Create classes here, then assign them to products and reference them in your flat rate method formula.
Tab 5: Payments Settings
The Payments tab lists all available payment gateways – both those installed and those suggested by WooCommerce. This is where you activate and configure how customers pay.
Available Payment Methods
By default, WooCommerce comes with:
- WooCommerce Payments (Stripe-based, first-party) – easiest setup for US/UK/AU/CA stores
- PayPal Standard – legacy redirect-based PayPal (still works but dated UX)
- Direct bank transfer (BACS) – customers transfer manually, you confirm when payment arrives
- Check payments – physical cheque, rarely used today
- Cash on delivery – payment at delivery, useful for local delivery setups
Third-party gateways (Stripe, Razorpay, Mollie, etc.) appear here after installing their plugins. Once payments are working, your next priority is making sure your store is discoverable. Check out our guide to WordPress SEO basics for beginners to get your store ranking in search results.
Which Gateway to Enable First
For most new stores, enable WooCommerce Payments (if available in your country) plus PayPal. Offering two payment options increases conversion. If WooCommerce Payments is not available in your country, install the Stripe plugin directly.
Gateway Order
Drag to reorder. The first enabled gateway becomes the default selection at checkout. Put your preferred or most-used gateway first. Studies consistently show the default selection gets chosen by the majority of customers.
Common Mistakes with Payments
- Leaving test mode on after launch – real customers cannot pay
- Not testing the full checkout flow in live mode before going public
- Enabling too many gateways – 2-3 options is enough; more creates decision fatigue
- Forgetting to configure webhook URLs in your gateway dashboard
Tab 6: Accounts and Privacy Settings
This tab controls the customer account experience and data privacy compliance. With GDPR, CCPA, and similar laws, this section matters legally as well as for UX.
Guest Checkout
The most important setting here. Enable guest checkout unless you have a specific reason to force registration. Mandatory account creation is one of the leading causes of checkout abandonment. Research by Baymard Institute consistently shows it is the second most common reason customers leave.
Account Creation
Three options you can mix:
- Allow customers to create an account on the checkout page – adds an optional “Create account” checkbox at checkout
- Allow customers to create an account on the My Account page – standalone registration form
- Automatically generate username and password – removes friction for customers who want an account but do not want to choose credentials
Best practice: enable all three. Make account creation optional but easy.
Account Erasure Requests
These settings handle GDPR-style right-to-erasure requests. You can enable removing personal data from orders when a customer requests erasure, and control whether pending orders are anonymized. For EU stores, configure these properly and link your Privacy Policy page.
Personal Data Retention
Set how long WooCommerce keeps personal data for inactive accounts, pending orders, failed orders, and cancelled orders. Defaults are conservative (do not auto-delete). If you need to comply with data minimization requirements, set retention periods here.
Privacy Policy
Link your Privacy Policy page and Registration Privacy Policy. WooCommerce adds consent checkboxes on registration and checkout forms. Always have a real privacy policy – cookie-cutter templates are better than nothing, but a lawyer-reviewed one protects you properly.
Tab 7: Emails Settings
WooCommerce sends a range of automated emails to customers and store admins. The Emails tab lets you configure which ones fire and customize their appearance.
Email Notifications List
You will see a table of every email WooCommerce sends. Each email can be enabled or disabled individually. The main ones:
| Recipient | When It Sends | Keep Enabled? | |
|---|---|---|---|
| New order | Admin | Every new order | Yes |
| Cancelled order | Admin | Order cancelled | Yes |
| Failed order | Admin | Payment fails | Yes |
| Order on-hold | Customer | Payment pending review | Yes |
| Processing order | Customer | Payment received | Yes |
| Completed order | Customer | Order marked complete | Yes |
| Refunded order | Customer | Refund issued | Yes |
| Customer invoice | Customer | Manually sent from order screen | Yes |
| Customer note | Customer | When you add a note to an order | Yes |
| Reset password | Customer | Password reset request | Yes |
| New account | Customer | Account created | Yes |
Email Sender Options
Set the “From” name and “From” email address for all WooCommerce emails. Use a real email on your domain (like [email protected]), not a Gmail or Hotmail address. Generic free email addresses increase spam filter scores. Also, configure an SMTP plugin (WP Mail SMTP, FluentSMTP) to actually send these – WordPress’s default mail function is unreliable on most hosts.
Email Template
Control the visual style of all WooCommerce emails:
- Header image: Upload your logo (600px wide recommended)
- Footer text: Add your company name, address, or unsubscribe link
- Base colour: Main background color (match your brand)
- Background colour: Email background (usually light grey or white)
- Body background colour: Content area background
- Body text colour: Main text color
Click “Click here to preview your email template” after making changes to see how it looks. Common mistake: leaving the default blue header color and “WooCommerce” text in emails – customers remember your brand better when emails match your store’s visual identity.
Tab 8: Advanced Settings
The Advanced tab is where WooCommerce connects to specific WordPress pages and exposes some technical controls. It also includes REST API and webhook management.
Page Setup
WooCommerce relies on four core pages to function. They must exist and be assigned here:
| Page | What It Does | What Breaks If Missing |
|---|---|---|
| Cart | Shopping cart view | Add-to-cart buttons break, no cart accessible |
| Checkout | Checkout process | Customers cannot complete orders |
| My Account | Customer dashboard | Login, orders, and account management fail |
| Terms and Conditions | Legal consent checkbox at checkout | Optional – leave blank to hide T&C checkbox |
If you ever accidentally delete one of the first three pages, WooCommerce shows a warning at the top of Settings. Recreate the page, add the correct shortcode or block, and reassign it here.
Checkout Process
Three checkboxes here:
- Enable the use of coupon codes: Same as General tab – controls coupon field visibility
- Calculate taxes on checkout totals: Normally on. Only disable if you handle tax completely outside WooCommerce.
- Force secure checkout: Forces HTTPS on the checkout page. Always keep this on if your site has an SSL certificate (it should).
REST API
The REST API tab lets you create API keys (Consumer Key + Consumer Secret) for external apps to read and write store data. Common uses:
- Mobile apps that connect to your store
- Third-party inventory or CRM systems
- Headless/decoupled storefronts
Create keys with the minimum required permissions (Read only if you just need reports, Read/Write for full sync). Never share secret keys in public code repositories.
Webhooks
Webhooks let WooCommerce push real-time event data to an external URL when something happens (order created, product updated, customer created, etc.). Used for Zapier automation, custom integrations, and headless builds. Each webhook has a topic (the event), a delivery URL, and a secret key for security validation.
WooCommerce.com Marketplace Connection
At the bottom of Advanced, you can connect your site to WooCommerce.com to manage your extensions and receive updates. This is optional – extensions update via WordPress’s standard plugin update mechanism regardless. The connection enables marketplace features and subscriptions management in your dashboard.
Quick Reference: The Most Important Settings to Get Right on Day One
If you are just setting up your store, focus on these first:
- Store address (General) – needed for taxes and shipping
- Currency (General) – set this before adding any products
- Tax enabled/disabled (General) – and whether prices are inclusive or exclusive (Tax)
- Shipping zones with a “Rest of World” fallback (Shipping)
- At least one working payment gateway (Payments)
- Guest checkout enabled (Accounts)
- SMTP plugin configured for reliable email delivery (Emails)
- Core WooCommerce pages assigned (Advanced)
Common Settings Mistakes and How to Fix Them
Wrong Currency After Launch
WooCommerce does not convert existing order totals when you change currency. If you launch in USD by mistake and need GBP, existing orders will show wrong symbols. Solution: fix it before your first real order, or use a migration script to update all product prices.
No Shipping Zone for International Orders
If a customer’s country is not covered by any zone, they see “No shipping options available” at checkout and cannot complete their order. Always add a “Rest of World” zone at the bottom of your zones list.
Taxes Calculated on Wrong Address
Setting tax calculation to “Base address” for a store that ships internationally means every customer gets charged your local tax rate, regardless of where they are. Set it to shipping or billing address for accurate cross-border tax calculation.
Payment Gateway Left in Test Mode
This is more common than you would think. After testing your checkout, switch your gateway to live mode and run one real transaction with a real card before announcing your store publicly.
Emails Going to Spam
WordPress’s built-in mail function uses PHP mail(), which most modern email servers treat as suspicious. Install a transactional email plugin (WP Mail SMTP, FluentSMTP) and connect it to a proper sending service (SendGrid, Postmark, Amazon SES, or your hosting provider’s SMTP server).
What’s Next in the WooCommerce for Beginners Series
This was Part 1 of the WooCommerce for Beginners series. You now have a solid understanding of every setting in the WooCommerce dashboard. The rest of the series covers the specific tasks you will do as you build and run your store:
- Part 2: How to Add Your First Product (simple, variable, and digital products)
- Part 3: Setting Up Shipping Zones and Rates the Right Way
- Part 4: Payment Gateways Compared – Which One is Right for Your Store
- Part 5: Managing Orders, Refunds, and Customer Communication
- Part 6: Essential WooCommerce Plugins for New Stores
Bookmark this page as your settings reference. As your store grows, you will revisit these options often – especially tax settings when you expand to new markets and shipping settings when you add new carriers.
Start with the Right Foundation
Need help setting up WooCommerce the right way from scratch? WPPioneer publishes step-by-step guides for every stage of building a WordPress online store. Explore more beginner guides and practical tutorials to get your store live faster.
Essential WordPress settings Online Store WooCommerce Beginners WooCommerce Dashboard WooCommerce Setup
Last modified: March 31, 2026


")