Shipping is where many WooCommerce stores quietly lose money and customers. You spend weeks perfecting your product pages, nailing your checkout flow, and optimizing your ads — then a customer hits the cart page, sees a flat $15 shipping fee on a $12 item, and leaves forever. The reverse is also painful: you offer free shipping on everything, absorb the cost, and watch your margins evaporate by the end of the quarter. Getting WooCommerce shipping configuration right is not a nice-to-have. It is foundational to running a profitable store.
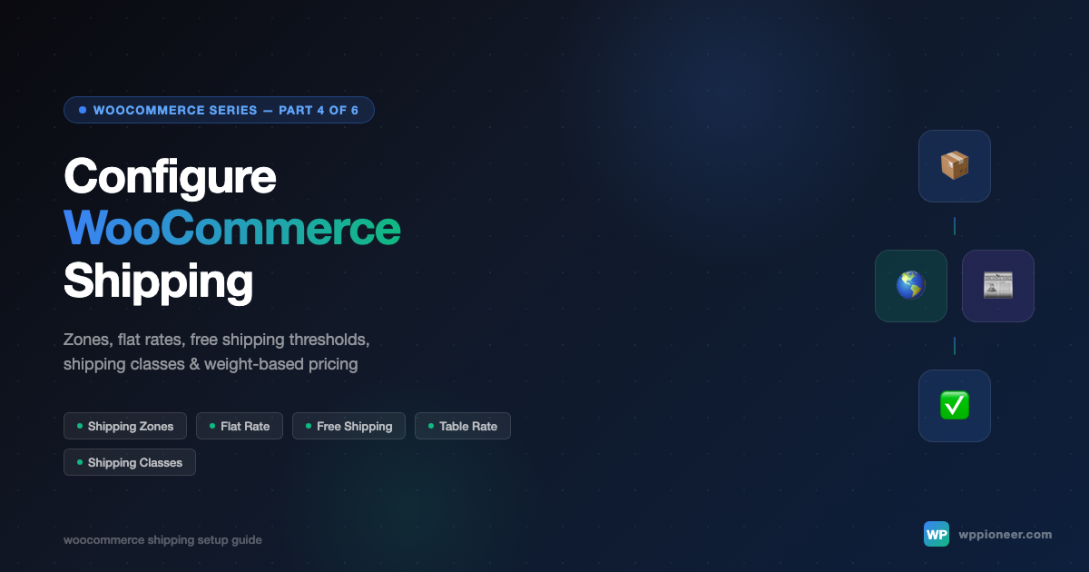
This woocommerce shipping setup guide walks you through every major shipping method available in WooCommerce: shipping zones, flat rate, free shipping thresholds, table rate pricing, weight-based rates, and shipping classes. By the end, you will have a complete, production-ready shipping configuration that charges customers fairly, protects your margins, and scales as your catalog grows.
This is part 4 of the WooCommerce series on WP Pioneer. If you are still setting up your store, start with the earlier posts on WooCommerce product types and payment gateways before diving into shipping.
Understanding the WooCommerce Shipping Architecture
Before touching any settings, it helps to understand how WooCommerce thinks about shipping. The system is built around three nested concepts: zones, methods, and classes. Zones define where you ship. Methods define how much you charge within a zone. Classes let you apply different rates to different product types within the same method. Once you see how these three layers interact, every other setting will make intuitive sense.
Zones
A shipping zone is a geographic area — a country, a state, a postal code range, or a continent. WooCommerce matches a customer’s shipping address to a zone and then applies only the shipping methods configured for that zone. If no zone matches, WooCommerce uses the special “Rest of the World” zone as a fallback.
Methods
Each zone can have one or more shipping methods. WooCommerce ships with three built-in methods: Flat Rate, Free Shipping, and Local Pickup. Third-party plugins can add more (USPS, UPS, FedEx, table rate, etc.). Customers see all enabled methods for their zone at checkout and can choose between them.
Classes
Shipping classes let you group products with similar shipping requirements — fragile items, oversized items, digital goods, etc. — and apply different cost formulas to each group within the same flat rate method. A single flat rate method can charge one price for standard products, a higher price for heavy items, and nothing for downloadable items, all simultaneously.
Step 1: Setting Up Shipping Zones
Navigate to WooCommerce → Settings → Shipping → Shipping Zones. You will see an empty list with a “Rest of the World” zone already present. That zone is your safety net — any customer whose address does not match a specific zone will fall through to it.
Click Add Shipping Zone to create your first zone. Give it a clear name like “United States” or “Continental US” — something your team will understand at a glance six months from now.
Defining Zone Regions
The zone region field lets you add multiple geographic conditions. You can mix and match countries, states/provinces, and postal codes within a single zone. Common patterns include:
- Domestic + Express domestic — one zone for your home country with standard flat rate, a second zone for the same country limited to major metro postal codes with an expedited option
- Regional by carrier zone — if your carrier charges by distance zones, mirror those zones in WooCommerce so rates stay accurate
- EU single zone — group all EU member states into one zone for consistent pricing, then add a separate zone for UK post-Brexit
- Free shipping territory — create a sub-zone for regions where you want to offer free shipping to everyone, separate from regions where it is threshold-based
Zone order matters. WooCommerce matches zones from top to bottom and uses the first match. Drag zones to reorder them with the handle on the left. More specific zones (state-level, postal code) should sit above broader zones (country-level).
Zone order matters — WooCommerce uses the first match from top to bottom. Always put your most specific zones (state or postal code level) above your broader country zones.
The “Rest of the World” Zone
The Rest of the World zone is special — it cannot be deleted and does not have regions because it matches everything not already matched. If you do not want to ship internationally, add a flat rate method to this zone with a very high price, or leave it with no methods at all (WooCommerce will hide the shipping options and display a “no shipping available” message). If you do ship internationally, configure this zone with your international rates.
Step 2: Configuring Flat Rate Shipping
Flat rate is the workhorse of most WooCommerce stores. Inside any zone, click Add Shipping Method and select Flat Rate. Then click the method name to open its settings.
Basic Flat Rate Setup
The cost field accepts a number or a formula. A simple $5.99 rate works for many stores, but WooCommerce flat rate supports a powerful formula syntax that most store owners never discover:
| Formula | What It Does | Example Result |
|---|---|---|
[qty] | Number of items in cart | $2 * [qty] = $6 for 3 items |
[fee percent="10" min_fee="2"] | Percentage of cart subtotal with minimum | 10% of $30 cart = $3 |
[cost] | Subtotal of items with this shipping class | Good for class-specific surcharges |
A formula like 4.99 + ( 0.50 * [qty] ) charges $4.99 base plus $0.50 per additional item — a realistic approximation of how actual shipping costs scale with order size.
Tax on Shipping
The tax status dropdown on a flat rate method controls whether shipping cost is taxable. Tax rules for shipping vary by jurisdiction — in the US, most states tax shipping when the product itself is taxable. Set this based on your tax obligations, not on what seems simpler. If you are unsure, consult a tax advisor or use an automated tax plugin like TaxJar or Avalara.
Step 3: Setting Up Free Shipping with a Threshold
Free shipping is one of the highest-converting offers in ecommerce. Baymard Institute research consistently shows that unexpected shipping costs are the number one reason for cart abandonment. Offering free shipping above a threshold nudges customers to add one more item to qualify — which simultaneously reduces abandonment and increases average order value.
Add a Free Shipping method to your zone. The settings are intentionally minimal. The key field is Free Shipping Requires, which has four options:
- N/A — Always free. Use for zones where free shipping is unconditional (e.g., a local delivery zone).
- A valid free shipping coupon — Only free when a customer applies a coupon with “free shipping” enabled.
- A minimum order amount — Free when the cart subtotal hits the threshold you set. This is the most common choice.
- A minimum order amount OR a coupon — Either condition qualifies. Good for running targeted free shipping promotions.
Choosing the Right Free Shipping Threshold
The most common mistake is setting the threshold too low. A threshold that most customers already meet on their first order is just a cost you are absorbing without the order value lift that makes free shipping economically viable.
Calculate your threshold this way: take your average order value, add 20 to 30 percent, and round to the nearest sensible number. If your average order is $45, set the threshold at $55 to $60. This creates enough of a gap that a meaningful percentage of customers will add an item to qualify — and those customers more than offset the shipping cost you absorb on orders that would have met the threshold anyway.
Showing Free Shipping Progress in the Cart
WooCommerce does not display a progress bar toward the free shipping threshold by default. To show customers how close they are to qualifying, you need a plugin or a custom implementation. Several free plugins in the WordPress repository handle this — search for “WooCommerce free shipping bar” or “free shipping progress bar”. This small UX addition typically delivers a measurable lift in average order value and is worth implementing alongside the threshold itself.
Step 4: Using Shipping Classes for Product-Specific Rates
Shipping classes let you apply different cost formulas to different product types within a single flat rate method. This is far more elegant than creating separate zones or methods for every product type.
Creating Shipping Classes
Go to WooCommerce → Settings → Shipping → Shipping Classes. Click Add Shipping Class and fill in the name, slug, and description. Common class setups include:
| Class Name | Use Case | Typical Surcharge |
|---|---|---|
| Heavy Items | Products over 5 lbs / requires freight | +$8–15 flat or weight formula |
| Oversized | Large dimensions triggering dimensional weight | +$10–25 depending on carrier |
| Fragile | Needs special packaging / insurance | +$3–8 for handling |
| Digital | Downloadable products with no physical shipping | $0 (zero rate) |
| Standard | Default for most products | Base flat rate applies |
Assigning Classes to Products
Once classes are created, assign them to products via the Shipping tab on each product’s edit screen. There is a Shipping Class dropdown where you can select the appropriate class. Variable products can have different shipping classes per variation — useful if a product comes in both standard and extra-large sizes with different shipping costs.
Setting Class-Specific Rates in Flat Rate
Open a flat rate method. Below the main cost field, WooCommerce lists each shipping class with its own cost field. This per-class cost is added to the base rate for any item belonging to that class. The Calculation Type option determines how multiple classes in the same cart are handled:
- Per Class: Charge Shipping for Each Class — if a cart has both Standard and Heavy items, it charges the Standard class rate once AND the Heavy class rate once, then adds the base rate.
- Per Order: Charge Shipping for the Most Expensive Class — only charges for the highest-cost class in the cart. More customer-friendly, appropriate if you are charging for overhead rather than actual carrier cost.
Step 5: Weight-Based Shipping Rates
WooCommerce’s built-in flat rate method does not support true weight-based calculation natively. There are two paths to weight-based shipping: a third-party plugin, or a carrier rate plugin that queries your shipping carrier’s API directly.
Option A: Table Rate Shipping Plugin
The most popular solution is the Table Rate Shipping plugin (Woo’s official paid plugin, or several well-maintained free alternatives like “WooCommerce Table Rate Shipping” by Flexible Shipping). Table rate shipping lets you define cost rules based on weight, order total, item count, or any combination. A simple weight-based table looks like this:
| Min Weight (lbs) | Max Weight (lbs) | Shipping Cost |
|---|---|---|
| 0 | 1 | $4.99 |
| 1.01 | 5 | $7.99 |
| 5.01 | 15 | $12.99 |
| 15.01 | 50 | $19.99 |
| 50.01 | 999 | $35.00 + contact us |
For table rate shipping to work accurately, every product in your store needs a weight assigned on its Shipping tab. Missing weights are treated as zero, which will undercharge for heavy items. Run a WP-CLI query or use a bulk edit plugin to audit weight coverage before enabling weight-based rates.
Option B: Live Carrier Rates
Carrier rate plugins (USPS, UPS, FedEx, ShipStation) query the carrier’s API at checkout and return real-time rates based on the cart’s actual weight, dimensions, and destination. This is the most accurate approach but requires API credentials, a business account with the carrier, and configured product dimensions (not just weight). Expect some complexity in setup and occasional API timeouts affecting checkout performance. Cache carrier rates to mitigate the latency issue.
Product Weight and Dimensions — Non-Negotiable
Regardless of which weight-based approach you use, accurate product data is the foundation. Navigate to Products → All Products, filter by missing weight, and fill in the gaps. WooCommerce stores weight in the unit configured at WooCommerce → Settings → General → Measurements. Set this before you start entering product data, because changing the unit later does not auto-convert existing values.
Step 6: Advanced Zone Strategies
Simple stores can get by with a domestic zone, an international zone, and a Rest of the World fallback. As your store grows, you will want more nuanced zone configurations to match your actual carrier pricing and shipping strategy.
Local Delivery Zone
If you operate a physical location and offer local delivery or pickup, create a zone scoped to your city’s postal codes. Add a Local Pickup method (free) and optionally a reduced flat rate for local delivery. Customers in those postal codes will see these options alongside standard shipping methods — or you can disable the standard shipping methods for that zone if you exclusively handle local fulfillment in-house.
State-Level Zones for Tax Compliance
In the US, nexus states sometimes require separate shipping tax treatment. Creating a state-level zone (e.g., “California”) lets you configure a flat rate method with different tax settings from the national zone. This is a valid approach, though automated tax plugins (TaxJar, Avalara) handle this more reliably than manual zone configuration.
Priority International Tiers
If you ship internationally but your top export markets deserve better rates than the Rest of the World fallback, create explicit zones for those markets. A store selling to the EU might have: US (domestic), EU (priority international), UK (post-Brexit separate zone), Canada (close neighbor rates), and Rest of the World. Each zone gets purpose-built shipping methods with appropriate rates and carriers.
Step 7: Configuring Shipping Settings at the Store Level
Beyond zones and methods, several store-level shipping settings affect how your configuration behaves.
Shipping Origin Address
Navigate to WooCommerce Settings then choose General. The store address here serves as the origin for carrier rate calculations and determines the default ship-from address. If you ship from multiple warehouses, you will need a plugin that supports multiple origins — the default WooCommerce does not handle multi-origin shipping natively.
Shipping Destination
Under WooCommerce → Settings → Shipping → Shipping Options, the Shipping Destination setting controls which address WooCommerce uses to calculate rates at checkout: ship to the billing address by default, ship to a different address by default, or force shipping to the billing address. For most B2C stores, defaulting to billing address reduces friction; for B2B stores with separate billing and shipping departments, defaulting to a separate shipping address is better UX.
Hide Shipping Until Address Is Entered
The Hide Shipping Costs Until an Address is Entered option suppresses shipping options until a customer provides their address. This prevents zone-matching confusion in the cart (before any address exists, WooCommerce has to guess or show all methods). Enable this if you have many zones with different methods — it prevents customers in simple domestic zones from seeing international rates before they have entered their address.
Step 8: Combining Strategies — A Real-World Example
Here is a complete, production-ready shipping setup for a US-based store selling physical goods with a mix of standard, heavy, and digital products:
Zone 1 — United States (Contiguous)
- Flat Rate (Standard) — $5.99 base + $0.50 per item. Shipping class Heavy adds $8.00. Shipping class Digital adds $0.00. Calculation type: Per order (most expensive class).
- Free Shipping — Requires minimum order of $75. Shows above Flat Rate so it appears first.
- Local Pickup — Free. Enabled for in-store collection.
Zone 2 — United States (Alaska, Hawaii)
- Flat Rate — $14.99 base (carrier surcharge territory). No free shipping threshold — margins do not support it.
Zone 3 — Canada
- Flat Rate — $12.99. Heavy class adds $10.00.
- Free Shipping — Requires minimum order of $120 to account for international carrier cost.
Zone 4 — Rest of the World
- Flat Rate — $24.99. Heavy class adds $20.00.
- No free shipping — unpredictable carrier costs make it uneconomical.
This configuration handles the vast majority of scenarios without any third-party plugin, uses shipping classes to charge accurately for heavy items without manual per-product configuration, and preserves a free shipping incentive for the primary domestic market while protecting margins for remote and international zones.
Common Shipping Mistakes and How to Avoid Them
Even experienced WooCommerce store owners run into a handful of recurring shipping configuration mistakes. Here are the ones worth specifically avoiding:
Mistake 1: Overlapping Zones With No Clear Priority
If a US state is included in both a “US East Coast” zone and a “United States” zone, WooCommerce uses whichever zone appears higher in the list. This can cause inconsistent rates for customers in overlapping regions. Audit your zone regions regularly — especially after adding new zones — and ensure the order from top to bottom reflects your intended priority.
Mistake 2: Not Testing With Real Addresses
WooCommerce’s shipping calculator in the cart uses a simplified address form. To properly test your configuration, complete a full checkout (use a test payment method) with real addresses in each zone you have configured. Check that the correct methods appear, the correct rates are shown, and the free shipping threshold triggers correctly.
Mistake 3: Setting Free Shipping Threshold on Order Total Including Tax
By default, WooCommerce calculates the free shipping threshold against the cart subtotal before tax. If your store displays prices with tax included, customers may see a cart total that appears to meet the threshold while the underlying subtotal does not. Configure the free shipping minimum amount field to match how your store displays prices, and test the edge case explicitly.
Mistake 4: Forgetting Virtual Product Shipping Classes
Virtual products are not shipped, but if they share an order with a physical product, they can still trigger shipping calculations depending on your configuration. Assign a “Digital” shipping class with a $0 rate to all virtual products to ensure they never add unexpected shipping costs to mixed-product orders.
Mistake 5: Ignoring Dimensional Weight
UPS, FedEx, and USPS all charge by dimensional weight (length x width x height / divisor) when it exceeds actual weight. If your products are large and light — think pillows, lampshades, or large packaging — actual weight-based rates will underestimate your carrier cost significantly. Either add a dimensional surcharge via shipping classes or use a carrier rate plugin that handles dimensional weight automatically.
Testing Your Shipping Configuration
After building your shipping configuration, do not publish immediately. Run through this validation checklist:
- Test each zone — add a product to your cart, go to checkout, and enter an address in each zone you have configured. Confirm the correct methods appear.
- Test shipping class surcharges — add a product with a non-default shipping class (e.g., Heavy) to the cart. Confirm the rate reflects the surcharge.
- Test the free shipping threshold — bring the cart to just below the threshold, confirm free shipping is not shown. Add an item to push over the threshold, confirm free shipping appears.
- Test mixed carts — add products from different shipping classes. Confirm the calculation type (per class vs. per order) behaves as expected.
- Test the Rest of the World fallback — enter an address in a country you have not explicitly configured a zone for. Confirm the fallback zone’s methods appear.
- Test with a coupon — if you have configured free shipping via coupon, apply a coupon with free shipping enabled and confirm it works.
Document the results of each test. If you later change your shipping configuration, run the same tests again. Shipping misconfiguration is one of the most common causes of checkout abandonment and revenue loss — it is worth the 20 minutes of structured testing.
Plugins That Extend WooCommerce Shipping
WooCommerce’s native shipping is deliberately simple to keep the core lean. For more advanced scenarios, these plugins extend it reliably:
Table Rate Shipping (Flexible Shipping)
The free Flexible Shipping plugin by WP Desk is the most widely used table rate plugin in the WordPress ecosystem. It supports rate rules based on weight, order value, item count, and destination, with a clean interface and no subscription required for the core functionality. The Pro version adds more rule conditions and per-product rate tables. This is the first plugin to install if you need weight-based rates without paying for a carrier API integration.
ShipStation Integration
ShipStation connects WooCommerce to USPS, UPS, FedEx, DHL, and dozens of other carriers under one dashboard. It handles label printing, order tracking, batch processing, and real-time rate display at checkout. For stores shipping more than 50 packages per month, the time savings from ShipStation’s workflow automation typically outweigh the subscription cost within the first month.
WooCommerce Distance Rate Shipping
Distance Rate Shipping calculates shipping cost based on the distance between your store’s address and the customer’s address, using the Google Maps API. This is ideal for local delivery businesses where flat rates feel arbitrary to customers and carrier rates are irrelevant — think food delivery, local artisans, or same-day delivery services. Rates are defined as cost per kilometer or mile bracket.
What Comes Next in This WooCommerce Series
You now have a complete picture of WooCommerce shipping configuration — from zone architecture through flat rate formulas, free shipping thresholds, shipping classes, and weight-based approaches. The combination of shipping zones and shipping classes alone handles the vast majority of real-world stores without any additional plugins.
The next post in this series covers WooCommerce inventory management — stock levels, backorders, low stock notifications, and multi-location inventory for stores using third-party fulfillment. Shipping configuration and inventory management are tightly linked: if your inventory signals are unreliable, your shipping configuration cannot do its job correctly because you may be accepting orders for items you cannot actually ship.
If your WooCommerce store is still in early setup, our guide on understanding WooCommerce product types covers the product configuration decisions that directly affect how shipping rules apply to your catalog.
Frequently Asked Questions
Can I offer different shipping methods to different customer roles?
Not natively in WooCommerce. Zones are geographic — they match customer addresses, not customer roles. To offer wholesale customers free shipping while retail customers pay standard rates, you need a plugin like WooCommerce Members or a conditional shipping plugin that can evaluate user roles alongside zone/method logic.
Why is free shipping not showing up at checkout even after the cart exceeds the threshold?
Three common causes: the free shipping method is disabled (check the toggle in the zone), a conflicting shipping class has a negative cost that pulls the cart below the threshold calculation, or the “Minimum Order Amount” field is comparing against the wrong subtotal basis (tax-included vs. tax-excluded). Enable WooCommerce logging and check the shipping debug output to trace exactly what the calculation engine is evaluating.
How do I hide the shipping cost until checkout?
In WooCommerce → Settings → Shipping → Shipping Options, enable Hide Shipping Costs Until an Address is Entered. The cart page will show “calculated at checkout” instead of rates. Note: this only hides the shipping estimate in the cart — shipping rates still display normally on the checkout page once an address is entered.
What is the difference between a shipping class and a shipping zone?
Zones are geographic containers — they define where you ship. Classes are product attributes — they define what kind of product is being shipped. Zones answer “who is this customer and where are they?”. Classes answer “what is in the cart and does it need special handling?”. They work together: a zone method can have different costs for each class of product.
Summary
WooCommerce shipping is a layered system. Zones define where you ship. Flat rate methods and their formula syntax define the base cost within each zone. Free shipping methods with order minimums drive average order value while reducing abandonment. Shipping classes let you charge accurately for products that cost more to ship without creating separate zones or methods for every product type. Weight-based and table rate approaches handle stores where order weight drives carrier cost more than item count. And carrier API plugins handle the most complex multi-carrier, multi-origin operations.
Start simple: one domestic zone, a flat rate method with a sensible per-item formula, and a free shipping threshold set 25 percent above your average order value. That single configuration will outperform most default WooCommerce setups immediately. Add complexity only as your catalog, geography, and volume demand it.
Questions about your specific shipping setup? Drop them in the comments below. And if you are working through the WooCommerce setup series in order, the next post on inventory management will be up shortly — follow WP Pioneer to get notified when it publishes.
Free Shipping Shipping Zones WooCommerce WooCommerce Setup WooCommerce Shipping
Last modified: April 9, 2026


")