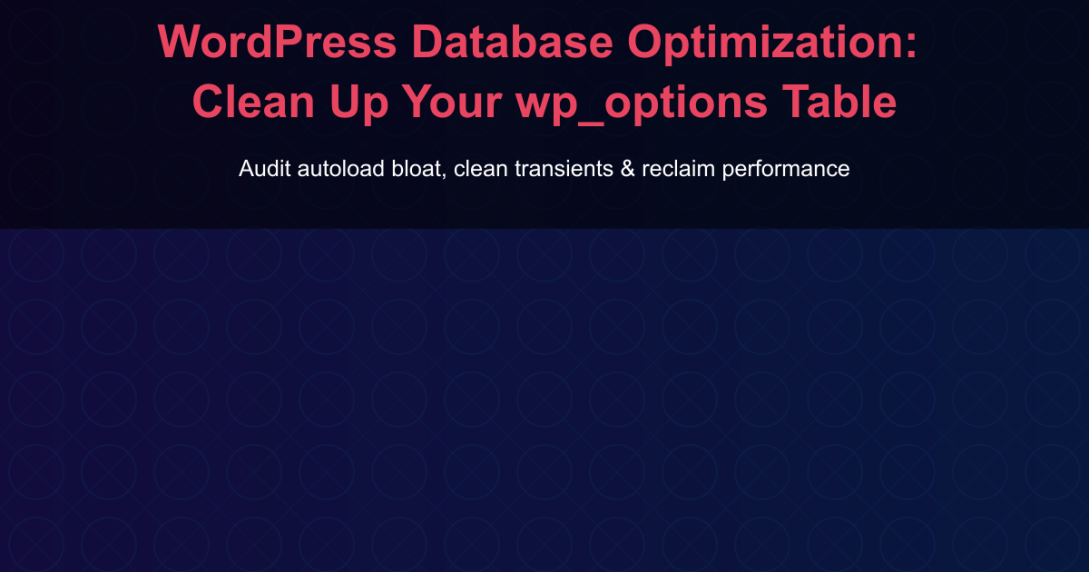
Your WordPress database is accumulating dead weight right now. Every plugin you have ever installed, every transient WordPress has ever cached, every post revision your editors have ever created, they all leave rows behind in your database. Most of them are still set to load on every single page request. This guide shows you exactly how to audit, clean, and maintain a lean wp_options table using SQL queries, PHP code, and WP-CLI commands you can run today.
The wp_options table is the nerve center of a WordPress installation. Site settings, plugin configurations, cron event schedules, cached API responses, and dozens of other values all live here. On a freshly installed WordPress site this table is tiny, under 100 rows, a few kilobytes total. On a site that has been running for a year or two with a typical plugin stack, it routinely grows to several thousand rows and several megabytes. The autoload mechanism turns that bloat into a performance tax that every page request pays, whether the data is needed or not.
What the wp_options Table Actually Does
Before diving into cleanup strategies, you need to understand the table’s structure and why the autoload column matters so much.
The wp_options table has four columns:
| Column | Type | Purpose |
|---|---|---|
option_id | BIGINT, auto-increment | Primary key |
option_name | VARCHAR(191), unique | The key, must be unique across the entire table |
option_value | LONGTEXT | The value, can be a string, number, or serialized PHP array/object |
autoload | VARCHAR(20) | ‘yes’ or ‘no’, controls whether this row loads on every page request |
When WordPress boots, it runs a single SQL query to load every row where autoload = 'yes' into memory at once. This is intentional, it is far faster than making individual database queries for each setting as they are needed. The trade-off is that every autoloaded option consumes memory and contributes to that initial query’s execution time, regardless of whether the current page actually needs it.
On a well-maintained site, autoloaded data stays under 800 KB. On a bloated site, it regularly exceeds 5 MB, and some agency-managed sites with dozens of plugins end up with 15 MB or more loading on every single request. At that point your database server is doing the equivalent of loading an entire novel into RAM just to show a blog post.
How Data Gets Into wp_options
Every call to add_option() or update_option() without the third parameter explicitly set defaults to autoload = 'yes'. This means plugins that call add_option( 'my_plugin_giant_cache', $data ) are silently adding potentially megabytes of data to your always-loaded set. Many plugin authors do not think about this parameter at all. When you multiply this across 20 or 30 active plugins, plus the deactivated ones that never cleaned up after themselves, the bloat compounds fast.
Step 1: Audit Your Autoload Bloat
The first step is understanding exactly what you are dealing with. The SQL file below gives you a complete picture: total autoload size, the largest individual rows, and which rows are expired transients that were mistakenly set to autoload.
Run this in phpMyAdmin, TablePlus, Sequel Pro, or via wp db query < 01-check-autoload-options.sql. The output of query 1 is your baseline. If autoload_size_mb is above 1 MB, you have meaningful work to do. If it is above 3 MB, this optimization is urgent.
Pay close attention to query 3, which finds transients that have autoload = 'yes'. This is a double problem: transients are temporary cache entries that should expire and be replaced, and they should never be set to autoload because they are not needed on every request. Some older plugins still do this by accident.
If your autoload data exceeds 1 MB, every single page request, including those that never touch the affected options, pays that memory and query cost. On a site doing 50,000 page views per day, that is 50,000 unnecessary megabyte-scale memory allocations.
Step 2: Clean Up Expired Transients
Transients are WordPress’s built-in key-value cache. Plugins use them to store API responses, computed values, and temporary data with an expiry time. When a transient expires, WordPress is supposed to delete it the next time it is accessed. In practice, this only happens when code actually calls get_transient(), if a plugin is deactivated or the transient is never read again, it sits in your database indefinitely, accumulating silently.
Each transient creates two rows in wp_options: one for the data (named _transient_{key}) and one for the expiry timestamp (named _transient_timeout_{key}). On a busy site with API-heavy plugins, you can easily accumulate thousands of orphaned transient pairs. Sites that use WooCommerce, Elementor, or Gravity Forms commonly end up with hundreds of megabytes of expired transient data sitting in the database.
The SQL above cleans expired transients safely. It deletes data rows whose timeout counterpart has a value less than the current Unix timestamp. It also handles site transients, which are used by plugins that call set_site_transient() instead of set_transient().
If you prefer WP-CLI, a single command handles expired transients:
wp transient delete --expiredTo flush all transients, expired and active, use wp transient delete --all. This forces WordPress to rebuild all caches on the next page load. There will be a brief performance dip immediately after, but it is safe. Use this option when you suspect plugins have stored corrupted transient data or when you want a clean slate after a major plugin update.
Should You Use a Plugin for Transient Cleanup?
Plugins like WP-Optimize and Advanced Database Cleaner can automate transient cleanup on a schedule. This is worth considering for sites where you cannot run WP-CLI regularly. However, understand the trade-off: these plugins themselves add rows to wp_options and run their own scheduled tasks. For a developer managing a site via SSH or a deployment pipeline, WP-CLI and direct SQL are cleaner options with no additional overhead.
Step 3: Remove Orphaned Post, User, and Term Metadata
While wp_options gets the most attention in database optimization discussions, the metadata tables are often where the real bulk accumulates. The wp_postmeta, wp_usermeta, and wp_term_relationships tables all suffer from the same problem: when the parent object is deleted, its child metadata rows are usually not cleaned up automatically.
Delete a product in WooCommerce and its dozens of _price, _sku, _stock_status, and custom field meta rows remain. Delete a user and their profile data, session tokens, and plugin-specific preferences persist in wp_usermeta. On a site that has been running e-commerce for several years, orphaned postmeta can account for hundreds of thousands of rows.
Run the COUNT queries first to understand the scale of the problem before running the DELETE statements. If you see more than 10,000 orphaned postmeta rows, run the deletion in batches to avoid locking the table for an extended period on a live site.
The auto-draft cleanup at the bottom of that file is worth highlighting separately. Every time an editor opens the WordPress post editor for a new post, WordPress creates an auto-draft row immediately. If the editor closes the tab without saving, that auto-draft sits in wp_posts forever, along with any meta rows that were created for it. Sites with active editorial teams can accumulate hundreds of these per month.
A Note on Table Locking
Running DELETE on large tables during peak traffic hours can cause table locks that affect site performance. For production sites, schedule intensive cleanup operations during low-traffic windows, typically between midnight and 6 AM in your primary audience’s timezone. Alternatively, use MySQL’s DELETE ... LIMIT 1000 pattern in a loop to batch the deletions, which avoids holding large locks.
Step 4: Control Post Revisions
WordPress saves a new revision of a post every time the editor autosaves or the author clicks “Update.” By default, there is no limit, WordPress keeps every revision forever. A post that has been revised 50 times has 50 rows in wp_posts, each with their own associated wp_postmeta rows. A busy news or blog site with hundreds of posts and active editors can accumulate tens of thousands of revision rows.
The fix is to define a revision limit in wp-config.php and then clean up existing revisions.
A limit of 5 revisions is appropriate for most publishing workflows. It gives authors meaningful undo history without allowing unbounded growth. The wp_revisions_to_keep filter shown at the bottom of that file lets you set different limits per post type, useful if you want more undo history for pages than for posts, or if you want to be aggressive about keeping CPTs lean.
One important detail: setting WP_POST_REVISIONS in wp-config.php only prevents new excess revisions from being created. It does not retroactively delete existing revisions. You need to run WP-CLI or SQL to remove the ones already stored.
How Many Revisions Are on Your Site Right Now?
Check with WP-CLI before deciding on a cleanup strategy:
wp post list --post_type=revision --format=countIf the count is in the thousands, prioritize this cleanup. Each revision row is nearly as large as the original post and carries its full set of postmeta.
Step 5: Full Database Optimization with WP-CLI
WP-CLI is the most efficient way to run comprehensive database maintenance. It gives you audit reports, targeted deletions, and MySQL OPTIMIZE TABLE calls, all without leaving the terminal. The script below walks through every optimization step in sequence, with a backup as the first action.
A few notes on what the script does at each step:
- Step 1, Backup: Non-negotiable. The script will not proceed if this fails. A database backup takes seconds and saves hours of recovery work.
- Step 2, Autoload report before: Gives you the baseline so you can measure the improvement after cleanup.
- Step 3, Expired transients: Uses WP-CLI’s native command, which handles all transient variants correctly, including multisite.
- Step 4, Revisions: Deletes all current revisions. Run this only after you have set
WP_POST_REVISIONSinwp-config.phpto prevent them from piling up again. - Step 5, Comments: Spam and trashed comments add rows to
wp_commentsandwp_commentmeta. These are often overlooked. - Step 6, OPTIMIZE TABLE: After bulk deletions, MySQL tables have gaps in their internal storage structure.
wp db optimizerunsOPTIMIZE TABLEon every WordPress table, reclaiming that disk space and defragmenting indexes. This can significantly speed up queries on large tables. - Step 7, REPAIR TABLE: Checks for and fixes any table corruption. Usually returns immediately with “OK” on healthy tables, but worth running after major cleanup operations.
After running this script, wp cache flush is worth running if your site uses a persistent object cache like Redis or Memcached. The object cache may be holding references to data that no longer exists in the database, which can cause subtle inconsistencies.
Step 6: Disable Autoload for Specific Options
After the initial cleanup, the next step is preventing heavy options from loading on every request. Not everything in wp_options needs to be in memory at all times. Sitemap indexes, Elementor CSS caches, and Jetpack option sets are classic examples of data that is rarely needed and should only load when explicitly requested.
The PHP file below shows how to programmatically update existing options to autoload = 'no' and prevent plugins from re-enabling autoload on their next update cycle.
The WP-CLI approach at the bottom of that file is often simpler for one-off changes. The PHP approach is better when you want to enforce the setting permanently and prevent plugins from overriding it on updates.
Be careful with this optimization. Do not disable autoload for options that WordPress core needs on every request, things like siteurl, blogname, active_plugins, and template. Setting these to autoload = 'no' would cause WordPress to make additional database queries on every page load, which is worse than the original problem. Stick to plugin-specific caches, large serialized datasets, and options that are only needed in specific admin contexts.
How Often to Run Database Optimization
The right maintenance schedule depends on your site’s activity level and plugin stack.
| Site Type | Transient Cleanup | Revision Cleanup | OPTIMIZE TABLE | Full Audit |
|---|---|---|---|---|
| Low-traffic blog (<10K PV/month) | Monthly | Quarterly | Quarterly | Every 6 months |
| Active blog or brochure site | Weekly (automated) | Monthly | Monthly | Quarterly |
| WooCommerce store | Daily (automated) | Weekly | Weekly | Monthly |
| High-traffic news/editorial site | Daily (automated) | Daily | Weekly | Monthly |
For automated transient cleanup, you can add a WP-Cron event that runs wp transient delete --expired via a shell_exec or wp_remote_post hook. A better approach on managed hosting is a real server cron job pointing to wp-cron.php directly, which avoids the reliability problems inherent in pseudo-cron. If you are on cPanel, WP Engine, or Kinsta, they all provide scheduled task interfaces you can use for this.
What to Do About Deactivated Plugin Leftovers
One of the most common sources of wp_options bloat is data left behind by plugins that have been deactivated or deleted. WordPress provides an uninstall hook, register_uninstall_hook(), that allows plugin developers to clean up their data when the plugin is removed. Many plugins do not implement it, or implement it incompletely.
After running the audit queries, you will see option names in your autoload set that correspond to plugins no longer active on your site. These are safe to delete. The pattern is straightforward: if the option name starts with a plugin’s prefix and that plugin’s folder no longer exists in wp-content/plugins/, the data is orphaned.
Use this WP-CLI approach to safely delete specific orphaned options:
wp option delete old_plugin_option_nameFor large-scale cleanup of a specific plugin’s data, use the SQL pattern with LIKE 'plugin_prefix_%'. Always preview the rows with a SELECT before running DELETE.
Using Object Caching as a Long-Term Solution
Database cleanup solves the immediate problem, but it does not address the underlying pressure. As long as your plugin stack keeps writing large values to wp_options and wp_postmeta, the bloat will return. A persistent object cache changes the economics significantly.
When Redis or Memcached is configured as WordPress’s object cache backend, the initial wp_options autoload query still runs, but the result is cached in memory at the object cache layer. Subsequent page requests hit the cache instead of the database, meaning even a heavily bloated wp_options table has minimal database impact once the cache is warm.
Object caching does not replace database optimization, a bloated table still slows down cache-miss scenarios, fresh deployments, and cache flushes. But it dramatically reduces the per-request cost of autoload bloat between cleanups. For sites on managed WordPress hosting, Redis is typically available as an add-on. For self-hosted sites, installing the redis-server package and the wp-redis drop-in takes about 15 minutes. For a broader look at every lever that affects WordPress page load time, see our complete WordPress performance optimization guide.
Measuring the Impact
Do not take these optimizations on faith. Measure the before and after. There are several ways to quantify the improvement.
Query Monitor Plugin
Query Monitor shows you the initial options query execution time and the total number of database queries per page load. Before optimization, you will typically see the options query time in the 10–50ms range on a bloated table. After cleanup, that same query routinely drops to under 5ms.
WP-CLI Database Size Check
Run the following before and after your cleanup to see the actual size reduction:
wp db size --tablesThis shows each table’s size in kilobytes. The wp_options, wp_postmeta, and wp_posts tables typically show the largest reductions after a thorough cleanup.
Time to First Byte (TTFB)
On sites without full-page caching, TTFB is directly affected by PHP and database execution time. Tools like Google PageSpeed Insights, GTmetrix, or simply your browser’s Network tab will show a measurable TTFB improvement after reducing autoload bloat significantly. A reduction from 5 MB to under 1 MB of autoloaded data typically translates to a 50–200ms TTFB improvement, depending on server hardware. If your site is still sluggish after these database fixes, our WordPress slow loading site troubleshooting guide covers deeper profiling with Query Monitor, WP-CLI’s profile command, and server-level bottlenecks.
Building a Repeatable Maintenance Process
One-time cleanup is not enough. Database bloat returns. The difference between a site that stays lean and one that accumulates cruft every year is a maintenance process that runs automatically.
- Set
WP_POST_REVISIONSnow. This is a one-line change towp-config.phpthat pays dividends every day. It should be the first thing you do on any new WordPress project. - Schedule weekly transient cleanup. A server cron job running
wp transient delete --expiredevery Sunday morning keeps transient bloat from accumulating between manual audits. - Audit quarterly. Run the SQL from Step 1 every quarter to see what new plugins have added to your autoload set. Anything over 50 KB that is not a core WordPress value deserves scrutiny.
- Run OPTIMIZE TABLE after major changes. Any time you do a bulk deletion, during a major plugin cleanup, after a content migration, or after removing a WooCommerce catalog, follow it with
wp db optimize. - Add cleanup to your deployment pipeline. If you use a CI/CD workflow for WordPress deployments, add a
wp transient delete --expiredcall to your post-deploy script. This ensures each deployment starts with a clean transient cache.
Common Mistakes to Avoid
A few pitfalls catch developers during database optimization:
- Skipping the backup. Every SQL DELETE operation on production should be preceded by
wp db export. This is not optional. A missed WHERE clause can delete data that cannot be recovered. - Disabling autoload for core WordPress options. Options like
siteurl,blogname,active_plugins, andrewrite_rulesmust stay set toautoload = 'yes'. Setting them to ‘no’ breaks core functionality or forces additional queries on every page load. - Running OPTIMIZE TABLE on InnoDB tables without understanding the behavior. On InnoDB (the default MySQL storage engine), OPTIMIZE TABLE actually rebuilds the table and its indexes, which can lock the table briefly on large datasets. On MyISAM it defragments in-place. Know your table engine before running this during peak hours.
- Deleting all transients and then testing performance. After deleting all transients, the first few page loads will be slower than normal as WordPress and plugins rebuild their caches. Do not measure performance immediately after a full transient flush, wait 5–10 minutes and several page loads for caches to warm.
- Not checking for WooCommerce sessions in wp_options. If you are using WooCommerce without a session handler configured, user sessions get stored in
wp_optionswith the prefix_wc_session_. On any site with meaningful traffic this grows extremely fast. Install WooCommerce’s database session handler or use a Redis-backed session store.
Summary Checklist
Work through this checklist to bring a bloated WordPress database back under control:
- Back up the database with
wp db export - Run the autoload audit SQL to measure baseline bloat
- Delete expired transients with
wp transient delete --expired - Remove orphaned postmeta, usermeta, and term relationships using the SQL queries
- Add
WP_POST_REVISIONSconstant towp-config.php - Delete existing excess revisions with WP-CLI
- Run
wp db optimizeafter all deletions - Identify and disable autoload for oversized plugin options
- Verify improvements with Query Monitor and
wp db size --tables - Schedule ongoing maintenance: weekly transient cleanup, quarterly autoload audit
A clean wp_options table and lean metadata tables are not glamorous wins, but they are foundational. They affect every single page request your site serves. The SQL queries, PHP snippets, and WP-CLI script in this guide give you everything you need to audit and fix the problem today, and the maintenance schedule to keep it from coming back. Run the audit first, understand what is actually contributing to your autoload bloat, and work through the cleanup steps methodically. Your database will thank you on every page load.
Take the Next Step
Database optimization is one layer of WordPress performance. Once your wp_options table is clean, the next high-impact area is query performance on your content tables. If your site runs WooCommerce or has thousands of posts, see our guide on optimizing WordPress database queries with custom indexes, covering wp_postmeta JOIN optimization, the post__in performance trap, and when to reach for WP_Query versus direct SQL.
Database Optimization Optimize WordPress performance WordPress Transients wp_options WP-CLI
Last modified: April 10, 2026


")