A Beginner’s Step-by-Step Guide to Building Your First Website
So, you’ve just installed WordPress and now you’re staring at the dashboard wondering, “What should I do next?” You’re not alone. Many new users feel overwhelmed at first, but the good news is, once you understand the basics, everything starts to click.
This guide will walk you through the essential setup steps, help you avoid common pitfalls, and get you excited about building a professional and engaging website.
Understanding the WordPress Dashboard
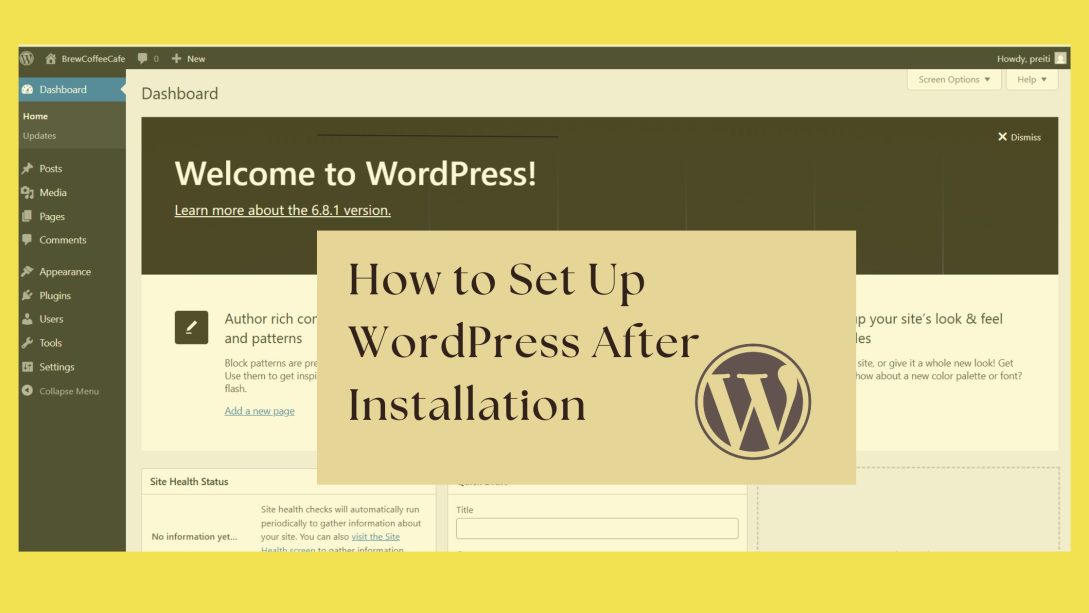
The WordPress dashboard is your website’s control panel. When you first log in, you’ll see the Admin Toolbar at the top and a left-hand menu packed with options. It might feel like a lot, but each section is highly purposeful-
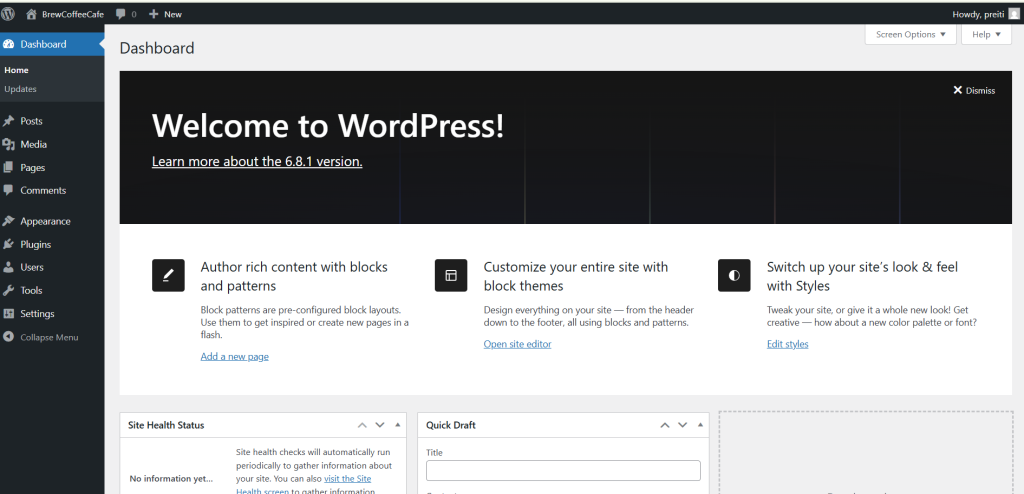
- Dashboard > Home: Gives you a summary of recent activity, site health, and quick links.
- Posts: Where you create and manage blog content.
- Media: A library of your uploaded images, videos, PDFs, and other files.
- Pages: Use this to build timeless pages like About, Contact, Services, and more.
- Comments: Displays feedback from users, which you can approve, delete, or reply to.
- Appearance: Control your site’s look and feel through themes, menus, and widgets.
- Plugins: Extend your site’s capabilities with additional functionality.
- Users: Manage who can log into your site and their permissions.
- Tools & Settings: Offers additional admin tools and deep customization controls.
Spend time clicking through each section. This dashboard becomes second nature with regular use.
Change Site Title, Tagline, and Timezone
These are foundational identity settings for your site. Go to Settings > General to update:
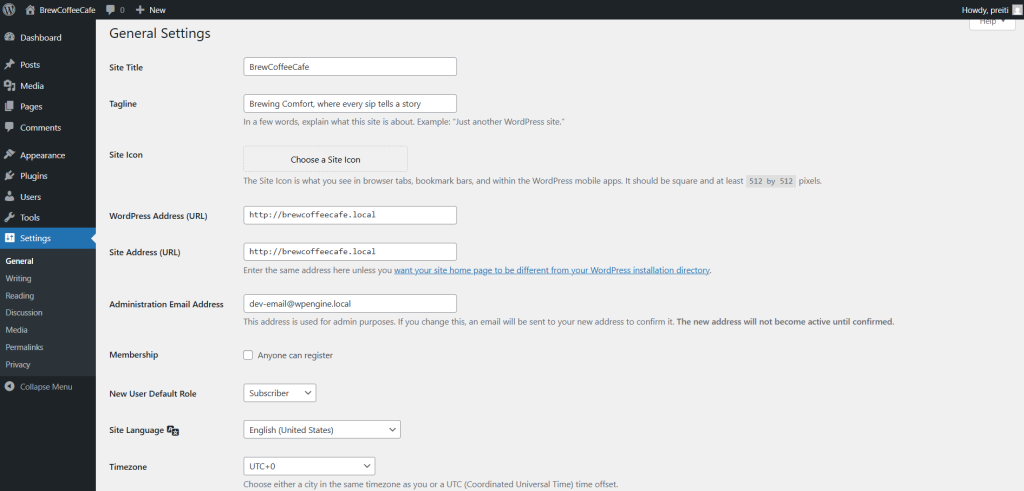
- Site Title: Appears in your browser tab and search results; it’s your website’s name.
- Tagline: A short description explaining what your site is about. It’s often visible in search engine previews.
- Timezone: Ensure your post scheduling and log timestamps align with your local time zone.
Make these personal and relevant to your niche. A meaningful tagline can immediately convey value to new visitors.
Themes vs. Plugins: What They Do
Themes Define Appearance
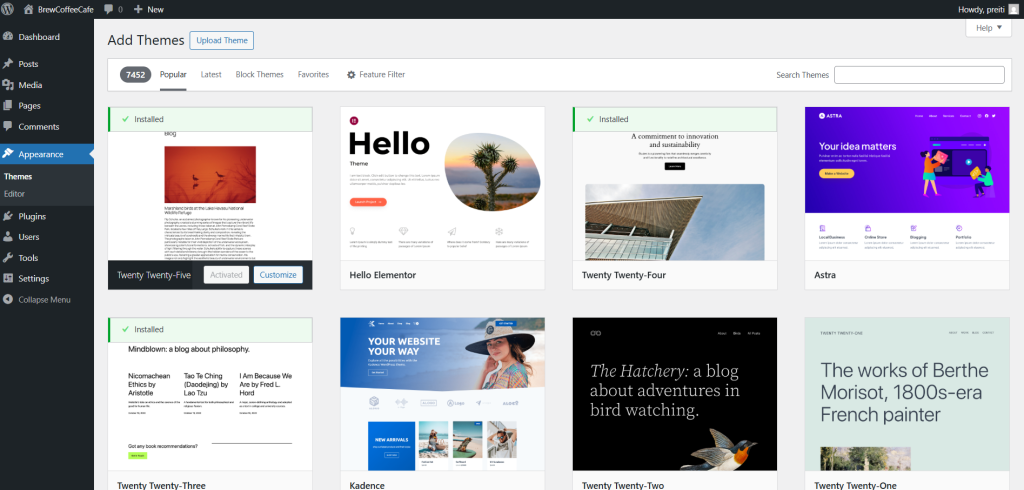
Themes control the design of your site. They determine the layout, fonts, colors, and even how menus and footers behave. Choosing the right theme is essential for user experience and mobile responsiveness.
If you want a blog or portfolio, pick a clean, content-first theme. For community sites or eLearning, choose robust options like BuddyX or Kadence that support integrations like BuddyPress or LearnDash.
Plugins Add Features
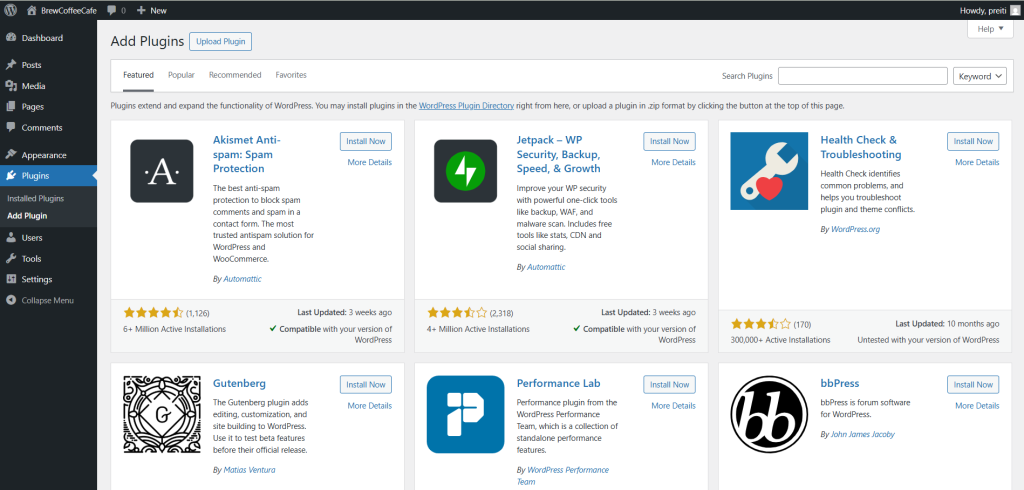
Plugins work like apps. They add capabilities that WordPress doesn’t offer by default. You can use plugins to add features like contact forms, sliders, backups, security scanning, or e-commerce tools.
Install only what you need. Too many plugins can slow down your site or create conflicts. Always check user reviews, update frequency, and compatibility before installing.
Delete Sample Content
WordPress installs demo content by default:
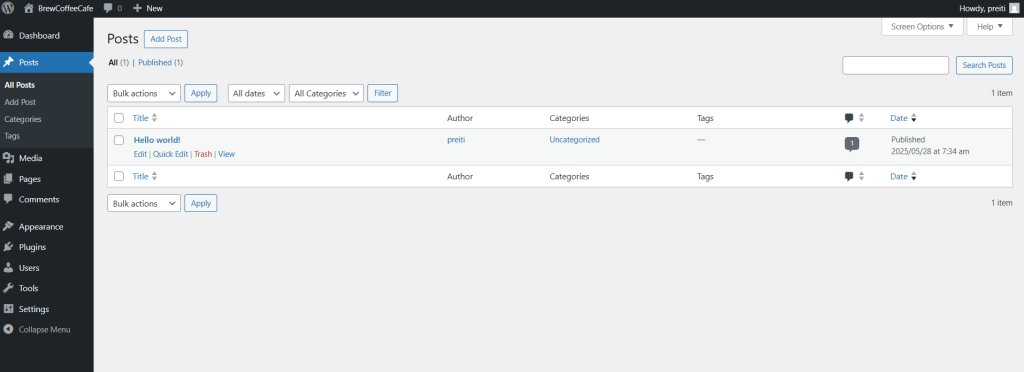
- The “Hello World!” blog post
- A Sample Page
- A default comment
These placeholders are useful for orientation but look unprofessional if left unchanged. Go to Posts > All Posts, Pages > All Pages, and Comments to remove them. Replace them with your own content that reflects your brand and purpose.
Configure Permalinks for SEO
Permalinks are the URLs for your pages and posts. By default, WordPress uses a query string structure like ?p=123, which isn’t user-friendly. Clean URLs help both search engines and readers.
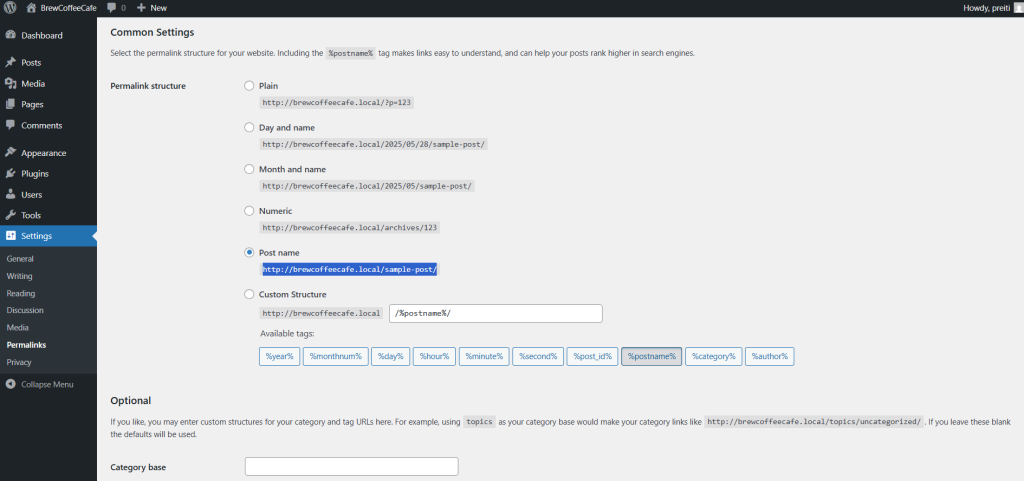
To improve this, go to Settings > Permalinks and choose the Post name option. This makes your URLs look like yourdomain.com/sample-post, which is easier to read and rank. Like you see in the image above ( http://brewcoffeecafe.local/sample-post/).
Always configure this early to avoid future SEO complications when links change.
Basic WordPress Security Tips
WordPress is secure, but common missteps can leave you vulnerable. Here’s how to safeguard your site:
- Change the default “admin” username: Use something unique and hard to guess.
- Create strong passwords: Include numbers, symbols, uppercase, and lowercase characters. Avoid dictionary words.
- Install a reputable security plugin: Options like Wordfence, iThemes Security, and Sucuri can scan your site for vulnerabilities and offer login protection.
- Limit login attempts and enable two-factor authentication (2FA).
Routine security checks and timely updates of plugins and themes are also critical to prevent exploits.
What to Do Next
Now that you’ve built the core framework of your site, you’re ready to bring it to life:
- Draft key pages: An About page that introduces you, a Contact page for reaching you, and a Homepage that anchors your brand.
- Test mobile responsiveness across various devices.
- Submit your site to Google Search Console so it can begin indexing in search results.
- Set up an XML sitemap using an SEO plugin like Yoast or Rank Math.
- Update your site favicon and logo under Appearance > Customize.
These steps transition your site from “installed” to “launched.”
Bonus: Tips for Long-Term Growth
A strong foundation is just the beginning. To grow your site:
- Install Google Site Kit to view traffic and search performance.
- Use caching and image optimization plugins to enhance speed.
- Build an email list early with Mailchimp or MailPoet.
- Automate backups weekly with tools like UpdraftPlus.
- Develop a content calendar and publish consistently.
- Engage users via blog comments, forums (BuddyPress), or social sharing tools.
Treat your site like a living project. Regular updates, monitoring, and content refreshes keep it relevant and trusted.
Design Tips for a Stunning Website
Your design should guide users toward key actions while reflecting your brand personality. Keep things elegant and usable:
- Stick with two or three colors that match your logo and theme.
- Use Google Fonts or web-safe fonts for readability.
- Make use of headings, spacing, and media to break up long content.
- Avoid cluttered layouts and popups that interrupt user experience.
- Use trust signals like testimonials, certifications, or social proof.
Your goal is to reduce friction and guide users naturally through your content.
Essential Plugins for Beginners
Here are key plugins worth installing from day one:
- Elementor: Drag-and-drop page builder for visual design
- MonsterInsights: Connects your site to Google Analytics
- Redirection: Manage 301 redirects without coding
- WP Mail SMTP: Ensures your contact form emails reach your inbox
- Sassy Social Share: Lets visitors share your content on social media
These plugins help streamline tasks while offering powerful control and visibility.
Setting a Static Homepage
If your goal isn’t a blog-first experience, set a static homepage. This gives visitors a curated first impression.
To do this:
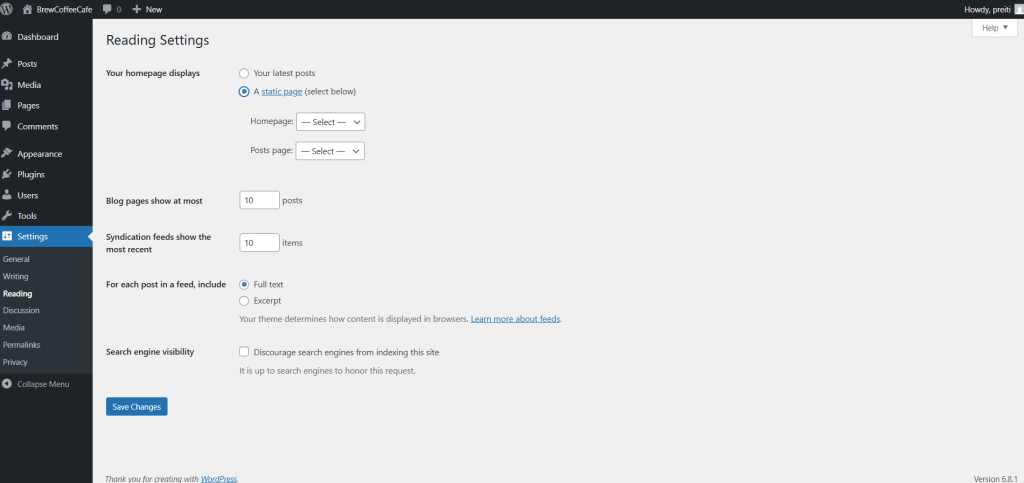
- Go to Settings > Reading
- Choose “A static page”
- Select your homepage and posts page from the dropdown
Make sure the page you set as the homepage has compelling content and a clear CTA (call to action).
Understanding WordPress User Roles
WordPress has a robust role system to control access:
- Administrator: Full site control
- Editor: Manage content created by others
- Author: Write and publish their own posts
- Contributor: Submit content for approval
- Subscriber: Can comment or manage their profile
Set roles thoughtfully to reduce accidental changes or security risks. You can modify roles or add custom ones using plugins like Members.
Managing Comments and Spam
Comments can foster community—but they need moderation.
Enable moderation via Settings > Discussion so you approve all new comments. Turn off anonymous comments if you prefer more control. Use Akismet or Antispam Bee to block bots and malicious spam.
You may also consider disabling comments sitewide for static websites.
Should You Use a Page Builder?
While Gutenberg is now highly capable, some users prefer advanced visual tools.
Elementor, Beaver Builder, and Spectra offer intuitive drag-and-drop editing with pre-built templates and global design controls.
If you want a pixel-perfect layout with minimal CSS, page builders provide that flexibility. But use them sparingly to avoid page bloat.
Accessibility Best Practices
Designing with accessibility in mind helps everyone:
- Use descriptive image alt text
- Provide proper contrast between background and text
- Enable keyboard navigation for menus and buttons
- Use headings hierarchically (H1, H2, H3)
Plugins like WP Accessibility Helper or One Click Accessibility can guide compliance with WCAG standards.
Understanding Hosting and Domains
Behind the scenes, your hosting provider stores your site files, and your domain name system (DNS) connects users to it.
Choose managed WordPress hosting for better performance and easier maintenance. Reputable providers include:
- SiteGround: Great support and speed
- Cloudways: Flexible and scalable
- Kinsta: High-performance managed hosting
Familiarize yourself with your hosting dashboard. Learn where to access email settings, backups, file manager, and domain settings.
Add a Contact Form to Your Site
A contact form is essential for leads, support, and feedback. Plugins like WPForms offer drag-and-drop creation with spam protection. You can also integrate reCAPTCHA for added security.
Embed the form on a dedicated Contact page, or place it in your footer or sidebar using widgets or shortcodes.
Let’s Talk!
Have a question or something to add? Leave a comment or get in touch through our contact form. You can also download this guide as a printable PDF and subscribe to our newsletter for weekly WordPress insights.
You’ve already taken the hardest step. Keep building, you’re on the right track.
First steps after WordPress install Getting started with WordPress WordPress beginner guide WordPress post-install tasks WordPress tutorial for beginners
Last modified: May 29, 2025


")