
WordPress powers more than 40% of all websites on the internet, and a big reason for that popularity is the plugin ecosystem. There are over 60,000 plugins available in the official repository, and thousands more through premium marketplaces. Plugins handle everything from contact forms and SEO to WooCommerce stores and membership systems.
But here is the problem: every plugin update carries risk. A developer pushes a new version, you click “Update Now,” and suddenly your site is showing a white screen, your checkout is broken, or your admin dashboard has disappeared. It happens more often than you might think, and it does not have to.
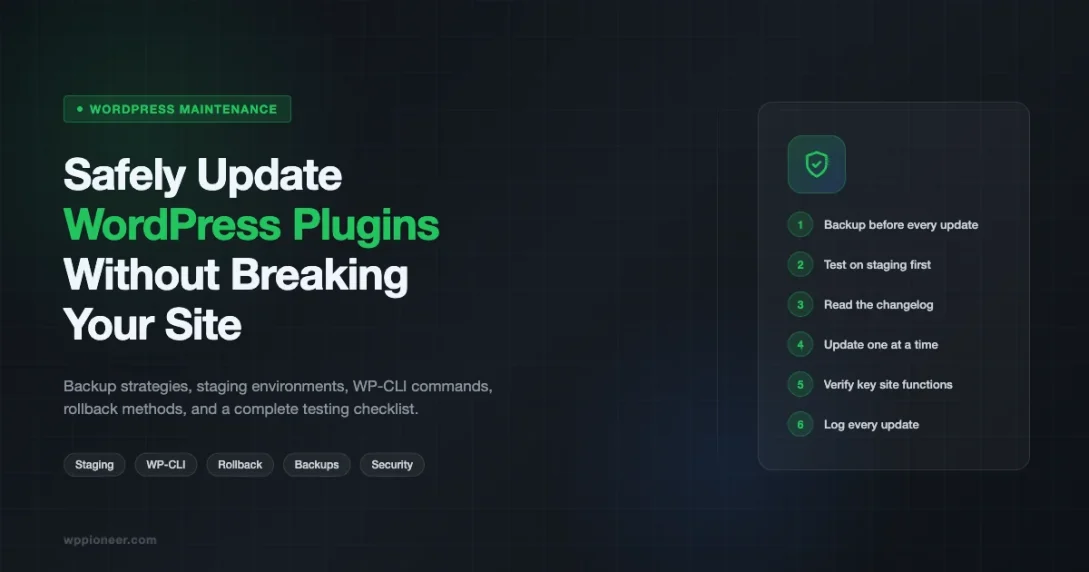
This guide walks you through a professional plugin update workflow that protects your live site at every step. Whether you manage one WordPress site or dozens, these practices will save you from the kind of disasters that make site owners lose sleep.
Why Plugin Updates Break Sites
Before you can prevent plugin conflicts, it helps to understand why they happen in the first place. Updates break sites for a handful of predictable reasons.
PHP Version Incompatibility
PHP is the server-side language that powers WordPress. If a plugin developer upgrades their code to use PHP 8.1 or 8.2 features, but your hosting account is still running PHP 7.4, the update will cause a fatal error the moment WordPress tries to load that plugin. You might see a white screen, an HTTP 500 error, or a message like “Parse error: syntax error.” The fix is usually to upgrade PHP, but that can trigger other conflicts with older plugins that have not been tested on newer PHP versions.
WordPress Core Version Mismatches
Plugin developers test against the latest version of WordPress. If your site is running WordPress 6.1 but the plugin now targets 6.5 features, there can be incompatibilities. The reverse is also true: some older plugins break when WordPress itself updates and removes deprecated functions that the plugin was relying on.
Theme and Plugin Conflicts
Your active theme might register the same function name or CSS class that the updated plugin now uses. Two plugins might both try to load different versions of the same JavaScript library. A page builder plugin update might change how it renders shortcodes, breaking any posts that used custom templates. These conflicts are the trickiest to diagnose because there is no obvious error message pointing at the exact cause.
Database Schema Changes
Some plugin updates include changes to the database structure. If something goes wrong during that migration, you can end up with corrupted data or a plugin that expects tables that do not exist yet. WooCommerce updates, for example, sometimes include database upgrades that must run cleanly or the store stops working.
The Pre-Update Checklist: What to Do Before Clicking Update
Running through this checklist before every update session takes about ten minutes. It can save you hours of recovery work later.
Step 1: Back Up Your Site
A backup is non-negotiable. There is no safe plugin update workflow without one. Here are the three backup tools most WordPress professionals rely on:
- UpdraftPlus: The most popular free backup plugin in the repository. Go to Settings > UpdraftPlus Backups and click “Backup Now.” It backs up your files and database separately. The free version lets you store backups to Google Drive, Dropbox, or Amazon S3.
- ManageWP: If you manage multiple sites, ManageWP (now part of GoDaddy Pro) lets you run backups across all sites from a single dashboard. You can schedule daily backups and restore with one click from the cloud.
- Jetpack Backup (formerly VaultPress): Jetpack’s paid plans include real-time backups with one-click restore. Particularly useful for WooCommerce stores because it captures every order in real time.
After the backup completes, verify it. Download a test restore or confirm the backup file size looks correct. A backup you have never tested is a backup you cannot trust.
Step 2: Check Your PHP Version
Go to Tools > Site Health in your WordPress admin. Click the “Info” tab, expand the “Server” section, and check the PHP version. Compare this against the plugin’s requirements, which are listed in the plugin’s readme or on its WordPress.org page under “Requires” and “Tested up to.”
Step 3: Note Your Current Plugin Version
Write down (or keep a log of) the current version number before updating. If you need to roll back, you will need to know which version to restore. More on rollback later in this guide.
How to Read a Changelog Before Updating
A changelog tells you what changed in the new version. Most WordPress users skip it entirely, but reading it takes two minutes and can tell you whether an update is safe to apply or needs extra testing.
Where to Find Changelogs
For free plugins, go to the plugin’s page on WordPress.org and click the “Development” tab, then “Changelog.” Inside your WordPress admin, when you see the update notification, click “View version X.X.X details” in the update screen to open a modal with the changelog.
For premium plugins, the developer’s website usually has a changelog page. WooCommerce maintains a detailed changelog at woocommerce.com/changelog/woocommerce/. Yoast SEO publishes theirs at yoast.com/changelog/yoast-seo/.
What to Look For in a Changelog
- “Breaking change”: This phrase is a red flag. It means something in how the plugin works has fundamentally changed and your customizations may no longer work.
- Database migrations: Look for phrases like “database upgrade,” “schema change,” or “migration.” These updates need to run cleanly and should always be tested on staging first.
- Security patches: If the changelog mentions a security fix, prioritize this update. Security patches should be applied quickly, but still test on staging when possible.
- “Requires PHP X.X” or “Requires WordPress X.X”: New version requirements mean you need to verify your server meets them before updating.
Setting Up a Staging Environment
A staging site is a copy of your live site where you can test updates before they go live. If a staging environment feels like overkill, consider this: most developers who have been doing WordPress professionally for more than a year have a story about an update that destroyed a client site. A staging environment is what separates professionals from people who learn lessons the hard way.
Local by Flywheel (Local)
Local (getlocal.host) is a free desktop app that lets you run WordPress on your own computer. You can pull a live site down to your local machine using Local’s “Connect” feature if your host supports it, or you can export your site with a plugin like All-in-One WP Migration and import it into Local. Test the updates locally, verify everything works, then push changes back up. This is completely free and does not require any server configuration.
cPanel Staging
Many shared hosts (SiteGround, Bluehost, Hostinger) have built-in staging tools in their control panels. In SiteGround, go to Site Tools > WordPress > Staging, and click “Create Staging.” This creates a full copy of your site at a temporary URL. After testing, you can push the staging site to live with one click.
WP Stagecoach
WP Stagecoach is a premium plugin that creates an online staging copy of your site. It costs about $8/month per site but is particularly useful when your host does not have a built-in staging tool. Install the plugin, click “Create Stage,” and within a few minutes you have a working copy to test on.
Updating One Plugin at a Time vs. Bulk Updates
WordPress lets you check all pending updates and click “Update All Plugins” in one shot. This is fast but risky. Here is when each approach makes sense.
Update One at a Time When:
- You are updating on a live production site (ideally you would not be, but sometimes it is unavoidable)
- Any of the pending updates are for plugins that touch your site’s core functionality: WooCommerce, Elementor, Divi, your membership plugin, or your booking system
- A plugin has a major version bump (e.g., going from version 3.x to 4.x)
- You have not updated this plugin in several months and multiple versions are pending
Bulk Updates Are Acceptable When:
- You have already tested all updates on a staging environment
- The pending updates are all minor point releases (e.g., 2.4.1 to 2.4.2)
- The plugins being updated are low-risk utilities (a redirect manager, an analytics integration, a font loader)
Even when bulk updating, keep maintenance mode on during the process so visitors do not hit a partially-updated site.
How to Test After Each Update
Clicking “Update” is not the end of the process. You need to verify the site is still working. Run through this quick test sequence after every significant plugin update.
Frontend Checks
- Load your homepage in a private/incognito browser window (bypasses cache)
- Check the navigation menu
- Open 2-3 of your most important pages (home, about, services/products)
- Check your most recent blog post
- Resize the browser to check that the mobile layout is intact
Admin Checks
- Confirm the admin dashboard loads without errors
- Open the plugin’s own settings page to confirm it loads correctly
- Check that menus and sidebars are intact in Appearance > Menus and Appearance > Widgets
Key Feature Checks
- Contact forms: Submit a test entry through Contact Form 7 or Gravity Forms. Verify the confirmation message appears and the email arrives.
- WooCommerce: Add a product to cart, go through checkout, and confirm the order confirmation page loads. If you have a real payment gateway, use the test mode credentials to run a test transaction.
- Membership areas: Log out, then log back in as a subscriber to confirm restricted content is still protected and accessible content loads correctly.
- Search: Run a search query and verify results appear.
Auto-Updates: Should You Enable Them?
WordPress 5.5 introduced the ability to enable automatic updates per plugin, right from the Plugins page in your admin. The “Enable auto-updates” link appears next to each plugin. It is tempting to turn these on for everything and forget about it, but there are real risks to consider.
When Auto-Updates Make Sense
- Security-only plugins like Wordfence or Sucuri, where staying current is more important than the small risk of a breaking change
- Simple utility plugins with stable, predictable release cycles (e.g., Akismet, a simple redirect plugin)
- Sites you monitor daily, where you would catch a problem quickly
When to Keep Auto-Updates Off
- Any plugin that is central to your site’s business function: WooCommerce, your booking system, your membership platform
- Page builders (Elementor, Beaver Builder, Divi) which have complex interactions with themes and other plugins
- Sites where you do not have a daily check routine
- Any plugin that has historically had buggy releases
A middle-ground approach: enable auto-updates for WordPress core minor releases (security and maintenance releases) but keep plugin auto-updates off except for Akismet and security plugins.
Using WP-CLI for Controlled Plugin Updates
WP-CLI is a command-line interface for WordPress. If you have SSH access to your server (most managed hosting providers offer this), WP-CLI gives you fine-grained control over updates that the admin interface does not.
Check for Available Updates
wp plugin list --update=available --format=tableThis shows you every plugin with an available update, along with the current version and the new version. Review this list before updating anything.
Update a Single Plugin
wp plugin update woocommerceReplace woocommerce with the plugin’s folder name (the slug you see in the URL when viewing the plugin on WordPress.org, or the folder name in wp-content/plugins/).
Update All Plugins at Once
wp plugin update --allPut the Site in Maintenance Mode First
wp maintenance-mode activate
wp plugin update woocommerce
wp maintenance-mode deactivate
This sequence activates maintenance mode, runs the update, then deactivates maintenance mode. Visitors will see a “Briefly unavailable for scheduled maintenance” message instead of a broken page during the update.
Visual Regression Testing
A visual regression test compares screenshots of your site before and after an update to catch layout changes that are not obvious from a quick browse. This sounds complex, but there are free tools that make it straightforward.
Manual Screenshot Comparison
The simplest approach: take a full-page screenshot of your homepage and 2-3 key pages before updating. Use your browser’s built-in screenshot tool or a browser extension like GoFullPage (Chrome). After updating, take the same screenshots and compare them side by side. Look for layout shifts, missing elements, or styling changes.
WP Sandbox Plugin
WP Sandbox (available on WordPress.org) creates a sandboxed copy of your site where only you can see the updated version while visitors see the original. This lets you test the update in a real-world environment while keeping your live site stable.
ManageWP Safe Updates
ManageWP’s premium plans include a “Safe Updates” feature that automatically takes a before screenshot, applies the update, takes an after screenshot, and shows you a visual diff. If the visual diff looks wrong, you can roll back with one click. This is one of the most efficient workflows for agencies managing multiple client sites.
How to Roll Back a Plugin Update
Something went wrong after an update. Here is how to get back to the previous version.
Using the WP Rollback Plugin
WP Rollback is a free plugin that adds a “Rollback” link next to every plugin on the Plugins page. Click it, select the version you want to revert to (the version numbers are pulled directly from WordPress.org), and click “Rollback.” This works for any plugin hosted on WordPress.org.
For premium plugins not on WordPress.org, you will need to download the older version from the developer’s site (most keep an archive) and manually upload it via Plugins > Add New > Upload Plugin.
Manual FTP Rollback
If you have the old plugin files (from your backup), you can roll back via FTP:
- Connect to your server using FileZilla or a similar FTP client
- Navigate to wp-content/plugins/
- Delete the broken plugin folder (e.g., woocommerce/)
- Upload the old version’s folder from your backup
- Deactivate and reactivate the plugin from the WordPress admin
Restore from Backup
If the site is completely broken and you cannot access the admin, restore your pre-update backup. In UpdraftPlus, go to Settings > UpdraftPlus Backups, find your most recent backup in the list, and click “Restore.” Choose to restore the plugins component only if you just need to undo a plugin change, which is faster than a full restore. For more serious problems involving malicious redirects after a bad plugin, see our guide on fixing a WordPress redirect hack.
Keeping a Plugin Update Log
A plugin update log is a simple record of what you updated, when, and whether any issues came up. This might sound like extra overhead, but it pays off quickly when you need to diagnose a problem weeks later.
What to Track in Your Log
- Date of update
- Plugin name
- Previous version
- New version
- Any issues noticed
- How the issues were resolved (if any)
You can keep this in a Google Sheet, a Notion database, or even a simple text file in your site’s documentation folder. The format does not matter. What matters is the habit.
A Simple Notion Template
Create a Notion database with the columns above and add a new row each time you run updates. After a few months, you will be able to see patterns: which plugins have a history of causing problems, how often you are actually updating, and whether your update frequency is keeping pace with security releases.
How to Prioritize Which Plugins to Update First
Not all plugin updates are equally urgent. Here is a framework for deciding what to update immediately versus what can wait until your next maintenance window.
Tier 1: Update Within 24 Hours (Security Patches)
If a plugin update is listed as a security release, apply it as fast as possible, even on a live site if staging is not immediately available. Security vulnerabilities in popular plugins are actively exploited. The risk of being hacked is much higher than the risk of a minor visual bug from an update. If your site does get compromised, read our guide on how to fix a hacked WordPress site without losing your content.
How to know if it is a security release: look for “security fix,” “vulnerability,” “XSS,” “SQL injection,” or “CVE” in the changelog. Patchstack (patchstack.com) and WPScan (wpscan.com) maintain free databases of WordPress vulnerabilities and send alerts when plugins you use have known issues.
Tier 2: Update Within a Week (Bug Fixes)
Updates that fix active bugs affecting your site’s functionality should go on your list for the current week. Test on staging, then apply to production.
Tier 3: Update Within a Month (Feature Updates)
Feature updates bring new capabilities but do not fix existing problems. These can wait until your next scheduled maintenance window. Use that time to test thoroughly on staging and read the full changelog.
Building a Maintenance Window Into Your Schedule
The most disciplined WordPress site owners treat plugin updates as a scheduled task, not something they do whenever a red notification badge appears. Set a recurring time block each week or every two weeks for plugin maintenance. During that window:
- Back up the site
- Check the staging environment is synced with production
- Review changelogs for all pending updates
- Apply updates to staging one at a time
- Test key site functions on staging
- Apply verified updates to production
- Log the updates
This process typically takes 30 to 60 minutes for a site with 15 to 25 plugins. That is a small investment relative to the time it takes to recover from a botched update on a busy site.
Putting It All Together
Updating WordPress plugins does not have to be a stressful guessing game. The key is building predictable habits: back up before every update session, use a staging environment for anything that touches core site functionality, read changelogs before applying updates, test thoroughly after each update, and keep a log so you can trace problems back to their source.
The professionals who never seem to have disaster recovery stories are not just lucky. They have systems. The workflow in this guide is that system. Build it into your routine and your live site will stay stable through even the most significant plugin updates.
Beginner WordPress Tips Caching Plugins Plugin Comparison WordPress Maintenance WordPress Plugin Updates
Last modified: April 29, 2026


Beginner’s Guide • How-To Guides • Site Maintenance Basics
April 29, 2026 • Views: 0
How to Moderate WordPress Comments Without Checking Them Every Day