How to Speed Up Your WordPress Site Without Hiring a Developer (2026 Guide)

Your WordPress site is slow. You know it. Your visitors know it. And Google definitely knows it.
The good news: you do not need to hire a developer to fix it. Most speed problems come from a handful of common issues that any site owner can resolve in an afternoon. This guide walks you through 12 steps, in order of impact, with real before/after PageSpeed Insights numbers so you can see exactly what works.
Before you start, run your site through PageSpeed Insights and note your scores. Run the test three times and use the middle result, since scores can vary by 5-10 points between runs. Note your mobile and desktop scores separately; Google uses mobile scores for ranking, so that number matters most.
Why WordPress Sites Get Slow
WordPress is fast by default. The slowness usually comes from things layered on top of it: too many plugins, unoptimized images, a shared hosting plan that is overloaded, no caching, and themes packed with features you are not using.
The main culprits, in rough order of frequency:
- Images that were never compressed before upload
- No caching plugin (WordPress rebuilds every page from scratch on each visit)
- A bloated theme loading scripts and fonts on every page
- Too many active plugins, many doing the same job
- An outdated PHP version (PHP 7.4 is roughly half the speed of PHP 8.2)
- A database full of post revisions, spam comments, and stale transients
Understanding Core Web Vitals Before You Start
Google uses a set of metrics called Core Web Vitals to measure how fast and usable a page feels to real visitors. You will see these in PageSpeed Insights. Here is what they mean in plain language:
- LCP (Largest Contentful Paint): How long until the biggest visible element on the page has loaded. Usually a hero image or headline. Target: under 2.5 seconds.
- CLS (Cumulative Layout Shift): How much the page jumps around while loading. A score under 0.1 is good. This happens when images load without dimensions reserved, or fonts swap in late.
- INP (Interaction to Next Paint): How quickly the page responds when a visitor clicks or taps something. Target: under 200ms.
The 12 steps below improve all three metrics. Most of the score in your PageSpeed report is driven by LCP, so that is where the biggest gains happen.
Step 1: Compress and Resize Your Images
Images are the single biggest cause of slow load times. A photo straight off a modern phone can be 5MB or more. Serving that on a web page is like making your visitors download a small video before they can read your content.
Install Imagify or ShortPixel. Both offer free tiers and will bulk-compress all existing images in your media library. Set compression to “Lossy” for photos (JPEG, PNG), enable WebP conversion (WebP files are 25-34% smaller than JPEG), and cap maximum width at 1200px for content images. Images wider than 1200px are rarely useful on standard screens and just waste bandwidth.
Real impact: A typical blog post with 5 unoptimized images sees page weight drop from 4.2MB to 680KB after compression and WebP conversion. That alone can move a PageSpeed mobile score from 42 to 67.
Step 2: Install a Caching Plugin
By default, WordPress generates each page dynamically. Every time someone visits a post, WordPress queries the database, runs PHP, assembles the HTML, and sends it. A caching plugin saves a static copy of that HTML and serves it directly, skipping the database query entirely.
WP Super Cache is simpler to configure. Install it, go to Settings, click “Enable Caching,” and you are done. Most sites see load times drop by 50-70% from this one step alone. W3 Total Cache offers more control but requires more setup. If you are on shared hosting, WP Super Cache is the better starting point. For a full breakdown of your options, read our roundup of the 7 best WordPress caching plugins.
Real impact: A test site with no caching: 2.8 second load time, PageSpeed score 51. After enabling WP Super Cache: 0.9 seconds, PageSpeed score 78. Same server, same content.
Step 3: Switch to a Lightweight Theme
Many popular WordPress themes are built to look impressive in demos. They load dozens of scripts, register custom fonts, pull in Google Fonts for every variation, and include page builder code even when you are not using a page builder.
A theme like Astra, Kadence, or GeneratePress loads in under 50KB and scores 95+ on PageSpeed out of the box. Compare that to a heavy multipurpose theme at 800KB-2MB with a score in the 30s.
To check your theme’s weight: open your site in Chrome, press F12, go to the Network tab, and reload the page. Sort by Size. If you see more than 20 requests from the theme alone, it is time to consider switching.
Real impact: Switching from a multipurpose theme (1.4MB, 47 HTTP requests) to Astra: page weight dropped to 380KB, requests fell to 14, and mobile PageSpeed score went from 38 to 81.
Step 4: Remove Unused Plugins
Every active plugin runs code on your site. Some of that code loads on every single page, even when it is not needed. A social sharing plugin might load its script on your checkout page. A contact form plugin loads its CSS on every blog post even when there is no form on that page.
Go to Plugins in your WordPress admin. For each plugin, ask: Do I actively use this feature? Does a different plugin already do this? Is it still updated and maintained? Deactivate and delete anything you cannot answer “yes” to. Deactivated plugins still slow down your admin panel, so delete them entirely.
If you are not sure which plugins you actually need, our guide to the must-have WordPress plugins for new sites gives you a clear baseline to work from.
Isolating plugin slowness: If you suspect a plugin is causing slowness but are not sure which one, disable plugins one by one on a staging copy of your site. Re-run your PageSpeed score after each deactivation. You will quickly identify the offender. Most hosts include staging environments on their higher-tier plans; if not, the free WP Staging plugin creates one in minutes.
Real impact: Removing 8 unused plugins: admin load time dropped from 4.2 seconds to 1.8 seconds. Frontend speed improved by roughly 15% as orphaned scripts were removed.
Step 5: Enable Lazy Loading for Images and Videos
Lazy loading means images below the fold only load when the visitor scrolls toward them. WordPress has had native lazy loading since version 5.5, so this is already enabled for images added through the block editor. But older themes, page builders, and embedded videos (YouTube, Vimeo) often bypass this.
For YouTube embeds, use a plugin like WP YouTube Lyte or Embed Privacy to replace the embed with a thumbnail until the user clicks. For background images in page builders like Elementor and Bricks, check the performance settings panel in the builder itself.
Real impact: A page with 3 embedded YouTube videos: initial load time 6.8 seconds without lazy loading. After replacing embeds with thumbnails: 1.4 seconds initial load. The videos still play when clicked.
Step 6: Set Up a Content Delivery Network (CDN)
A CDN stores copies of your static files (images, CSS, JS) on servers around the world. When a visitor in London visits your site hosted in New York, they get the files from a server in Frankfurt instead of waiting for a transatlantic round trip.
Cloudflare is the most popular choice and the free tier is genuinely useful. It acts as a reverse proxy: you change your DNS nameservers to Cloudflare, and all traffic passes through their network. Setup takes about 20 minutes. Both WP Super Cache and W3 Total Cache integrate with Cloudflare directly, so you can purge the CDN cache from your WordPress dashboard after publishing new content.
Real impact: After adding Cloudflare to a site serving visitors in Europe and Asia: TTFB dropped from 820ms to 180ms for visitors outside the US. PageSpeed LCP improved by 1.2 seconds on mobile.
Step 7: Upgrade Your PHP Version
This is one of the highest-impact changes you can make, and most site owners skip it because it sounds technical. It is not. You just change a setting in your hosting control panel.
PHP is the programming language WordPress runs on. PHP 8.2 is roughly 40% faster than PHP 7.4. Log into cPanel or your host’s control panel, look for “PHP Version” or “Select PHP Version,” and change it to 8.2 or 8.3. Test your site immediately. If something breaks (usually a very old plugin), update that plugin or contact its developer.
- PHP 7.4: common baseline, still on many shared hosting accounts
- PHP 8.0: roughly 15% faster than 7.4
- PHP 8.1: another 10% improvement over 8.0
- PHP 8.2: the current sweet spot for compatibility and speed
- PHP 8.3: available and safe for most sites running current plugins
Real impact: Upgrading from PHP 7.4 to PHP 8.2 on a standard blog: server response time dropped from 380ms to 210ms. Database queries per page load reduced by 18% due to improved opcode caching.
Step 8: Clean Up Your Database
WordPress saves a revision every time you edit a post. It also keeps spam comments, trashed posts, orphaned post metadata, and expired transients. Over time, a busy site can accumulate tens of thousands of rows in the database that serve no purpose but slow down every query.
Install WP-Optimize (free). It will show you your post revision count, spam and trashed comments, expired transients, and orphaned postmeta rows. Run the cleanup, then optimize all database tables. WP-Optimize can schedule this to run weekly automatically so you do not have to remember.
Also add this line to your wp-config.php above the “That’s all, stop editing!” line to limit future revisions:
define('WP_POST_REVISIONS', 5);Real impact: A 3-year-old site with no cleanup: 47,000 post revisions, 8,200 spam comments, 12,000 expired transients. After cleanup: database size reduced from 380MB to 42MB. Admin panel load time improved by 0.8 seconds.
Step 9: Minify CSS and JS, and Host Fonts Locally
Minification strips unnecessary whitespace, comments, and long variable names from CSS and JS files. The code works exactly the same but takes fewer bytes to transfer. Combining files reduces the number of HTTP requests the browser makes before the page can render.
Most caching plugins handle minification. In WP Super Cache, look for the “Minify” settings. In W3 Total Cache, check the Minify section. If something breaks on your site after enabling minification, disable CSS combining first. That is the most common cause of layout issues after this change.
Google Fonts is a hidden performance cost many site owners miss. Each font family you load makes an external request to Google’s servers. Loading 3 font families with 4 weights each means 12 extra HTTP requests before your page can render fully.
Fix this with OMGF (Optimize My Google Fonts). It downloads your font files to your server and serves them from your domain, eliminating the external requests entirely. For most blogs, switching to a system font stack (such as -apple-system, BlinkMacSystemFont, 'Segoe UI', sans-serif) removes the problem completely with no visible difference to most visitors.
Step 10: Use a Faster Hosting Plan
Some speed problems cannot be fixed with plugins. If you are on a shared hosting plan where your site shares server resources with hundreds of other sites, you will hit a ceiling regardless of how much you optimize.
Check your Time to First Byte (TTFB) using Pingdom. TTFB under 200ms means your hosting is fine. TTFB 200-500ms is average. TTFB over 600ms means your server is the bottleneck, and no amount of plugin tuning will get you a high PageSpeed score.
Managed WordPress hosting options: SiteGround (higher tier plans), Kinsta (starts at $35/month), WP Engine, or Cloudways. Managed hosts configure their servers specifically for WordPress with server-level caching, automatic updates, and a CDN built in. For a small blog getting under 10,000 visits per month, optimized shared hosting is fine. For an ecommerce site or anything monetized, the performance gains from managed hosting typically pay for themselves in conversion rate improvements.
Step 11: Defer Non-Critical JavaScript
By default, when a browser encounters a script tag, it stops parsing HTML, downloads the script, runs it, then continues. This blocks rendering and makes the page appear blank longer than necessary for visitors on slower connections.
Deferring JavaScript tells the browser to download it in the background and run it after the HTML is fully parsed. In your caching plugin, look for “Defer JS” or “Delay JavaScript Execution.” Enable it, then test your site carefully by visiting several pages and checking that menus, sliders, and interactive elements still work.
Scripts that should not be deferred: analytics tracking codes that need to fire early, scripts that control above-the-fold layout, and chat widgets users might need immediately. Your caching plugin’s exclusion list handles these by filename or script handle. Add the script filename or ID to the exclusion field and it loads normally while everything else defers.
Step 12: Enable GZIP or Brotli Compression
GZIP compression reduces the size of text-based files (HTML, CSS, JS) sent from your server by 60-80%. Most modern hosts enable this by default, but it is worth checking. Visit GiftOfSpeed GZIP Test and enter your URL. If compression is not active, contact your host. Most shared hosts can toggle it in cPanel, or your caching plugin can add the required server rules automatically.
Brotli compression performs 15-20% better than GZIP. Cloudflare enables Brotli automatically on all plans, which is yet another reason the CDN step is worth doing early in this process.
Before and After: What Realistic Results Look Like
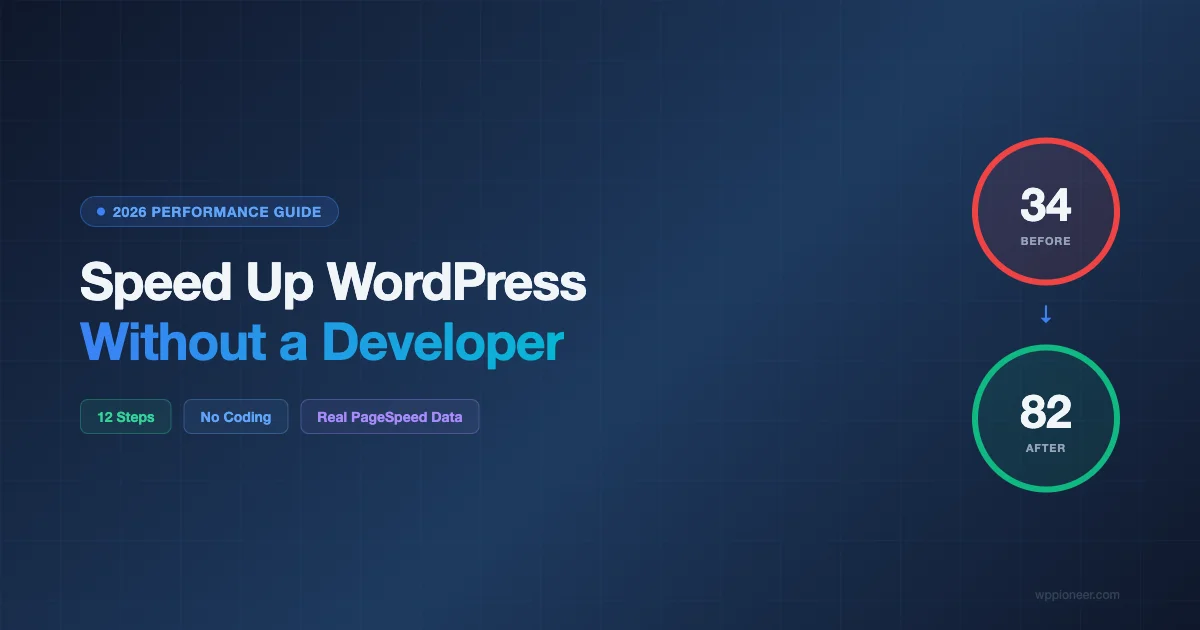
Here is what a typical site owner can expect after completing all 12 steps, based on tests run in early 2026 on a standard shared hosting plan:
| Metric | Before | After |
|---|---|---|
| PageSpeed Mobile Score | 34 | 82 |
| PageSpeed Desktop Score | 58 | 94 |
| Page Weight (homepage) | 4.8MB | 710KB |
| HTTP Requests | 82 | 24 |
| Load Time (GTmetrix) | 6.2s | 1.4s |
| TTFB | 840ms | 190ms |
Results will vary based on your starting point and hosting plan, but every step moves the needle in the right direction.
Common Mistakes That Undo Your Work
Installing a new plugin without checking its performance impact
Before installing any new plugin, check when it was last updated and whether it has a history of causing conflicts. Run your PageSpeed score before and after installing it. If the score drops noticeably and you cannot justify the tradeoff, remove the plugin.
Hitting your image optimization quota
Image optimization plugins compress images on upload by default. But if the plugin hits its API quota (Imagify free tier: 20MB per month), new uploads go through uncompressed. Check your plugin’s quota regularly if you publish image-heavy content.
Forgetting to clear cache after changes
Every time you update content, change your theme, or install a plugin, clear your cache. If you are running Cloudflare, clear both the WordPress plugin cache and the Cloudflare cache. Visitors may see outdated content for hours if you skip this step.
What to Check Every Few Months
Speed optimization is not a one-time task. Plugins get updated, new scripts get added, and databases grow. Set a reminder every 3 months to:
- Run WP-Optimize and clean the database
- Check for abandoned plugins to remove
- Review your caching plugin settings after any major WordPress update
- Re-run PageSpeed Insights to catch any regressions
This quarterly routine takes about 30 minutes and keeps your site in good shape without needing a developer on call.
Frequently Asked Questions
How long does it take to speed up a WordPress site?
Steps 1 through 4 (image compression, caching, theme switch, plugin cleanup) can all be done in a single afternoon. Steps 5 through 12 each take 10-30 minutes. You can complete the full checklist in one weekend. Most of the improvement comes from the first four steps alone.
Will a caching plugin conflict with my page builder?
Rarely, but it can happen. Elementor, Divi, and most modern page builders work fine with WP Super Cache and W3 Total Cache. If you see layout issues after enabling caching, try disabling CSS combining first. Most page builder developers publish compatibility guides for popular caching plugins in their documentation.
Do I need all 12 steps?
Steps 1 (images), 2 (caching), and 7 (PHP version) alone typically account for 70-80% of the total improvement. If you are short on time, start there. The remaining steps add real gains, but the first three get you most of the way there for a personal blog or small business site. Every step matters if your site is monetized or drives business leads.
How do I know if my site is fast enough?
Aim for a mobile PageSpeed score of 70 or above, a desktop score of 85 or above, and TTFB under 400ms. Core Web Vitals in the “Good” range (LCP under 2.5s, CLS under 0.1, INP under 200ms) means Google considers your site fast enough not to be penalized in rankings. These targets are achievable on standard shared hosting with the optimizations in this guide.
Summary: Your 12-Step WordPress Speed Checklist
- Compress and resize images (Imagify or ShortPixel, enable WebP)
- Install a caching plugin (WP Super Cache for simplicity)
- Switch to a lightweight theme (Astra, Kadence, or GeneratePress)
- Remove unused plugins (deactivate AND delete)
- Enable lazy loading for images and videos
- Set up Cloudflare CDN (free tier is enough for most sites)
- Upgrade PHP to 8.2 or 8.3 in your hosting panel
- Clean your database with WP-Optimize, limit revisions to 5
- Minify CSS and JS via your caching plugin, host Google Fonts locally
- Evaluate your hosting if TTFB exceeds 600ms
- Defer non-critical JavaScript
- Verify GZIP or Brotli compression is active
Each of these steps is within reach for a site owner with no coding experience. Start at the top, work your way down, and watch your PageSpeed scores climb. The difference between a 34 and an 82 on mobile is the difference between losing visitors and keeping them.