How to Move a WordPress Site to a New Domain Without Losing Google Rankings

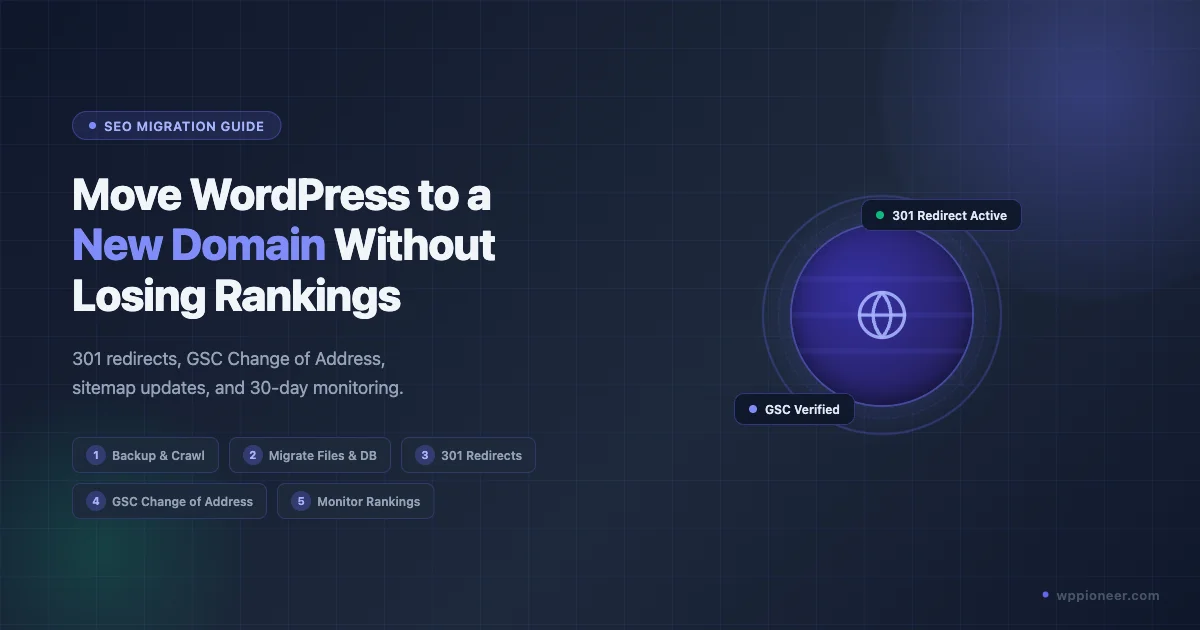
Moving a WordPress site to a new domain is one of the more technically demanding tasks a site owner can face. Do it wrong and you can watch months of SEO work disappear in days. Do it right and Google will follow your content to the new address with minimal ranking disruption.
This guide walks you through the entire process, from the pre-migration checklist through the 30-day monitoring window. Every step is sequenced to protect your search rankings as much as possible. If your goal is to move the site without any downtime during the process, read our guide on how to migrate your WordPress site without downtime alongside this one.
Why Domain Migrations Hurt Rankings (And How to Prevent It)
When you move to a new domain, Google has to re-evaluate every page. It needs to discover the new URLs, process the 301 redirects, transfer the link equity, and re-index the content under the new address. This takes time, typically four to twelve weeks for a site with moderate authority.
Rankings almost always dip temporarily during migration. The goal is to keep that dip shallow and the recovery fast. Sites that skip redirects or fail to update Google Search Console often see a permanent ranking drop because Google treats the new domain as a brand-new site with no history.
Pre-Migration Checklist
Before you touch a single file, spend time on preparation. Skipping this phase is the number one reason migrations go wrong.
Back Up Everything
Take a full backup of your WordPress files and database. Use a plugin like UpdraftPlus or duplicate the database directly through phpMyAdmin. Store the backup somewhere off-server, in a cloud drive or your local machine. If anything breaks during migration, this backup is your only safety net.
Crawl Your Old Site
Use a crawler like Screaming Frog or a free tool like Sitebulb’s trial to crawl your existing domain. Export the full URL list. This list serves two purposes: you will use it to build your redirect map, and you can compare it against the new domain after migration to confirm every URL has a redirect in place.
Pay special attention to:
- All indexable pages (not just posts, but tag archives, category pages, author pages)
- Your top-performing URLs by traffic, so you can prioritize those redirects
- Any URLs already earning backlinks (check Ahrefs or Google Search Console for referring pages)
Document Your Current Rankings
Export your current Google Search Console performance data. Go to Search Results, set a 3-month date range, and export impressions, clicks, and average position for all queries. Screenshot your top 20 keyword positions. This baseline lets you measure recovery after migration and spot any keywords that fail to transfer.
Register the New Domain and Set Up DNS
Register your new domain at least two weeks before migration so DNS has fully propagated. Set up a basic “coming soon” page on the new domain and verify it in Google Search Console right now, before migration. This gives Google a head start on associating the two domains with your account.
Choosing Your Migration Method
You have two main options: manual migration or using a migration plugin. Both work, but they suit different situations.
Manual Migration
Manual migration gives you the most control. You export the database, copy files via FTP or SSH, and handle the search-replace yourself using WP-CLI. This method works well if you are comfortable with command-line tools and understand WordPress file structure. It is also the safest approach for large sites where plugin-based migration can time out.
Migration Plugins
For most beginners and intermediate users, a migration plugin is the faster and safer path.
Duplicator packages your entire WordPress installation, including database, themes, plugins, uploads, and core files, into a single archive. You upload the archive and an installer script to the new host, run the installer, and the plugin handles the search-replace automatically. The free version works for sites under 500 MB. Larger sites need the Pro version.
All-in-One WP Migration takes a similar approach and is well-regarded for smaller sites. Its interface is very simple, which makes it a good choice if this is your first migration. The free version caps imports at around 512 MB on most hosts, so check your site size before relying on it.
For very large sites or multisite networks, consider WP Migrate DB Pro, which can push and pull databases and files between environments in stages, reducing the risk of timeouts.
Setting Up the New Domain
Install WordPress on the New Domain
Set up a fresh WordPress installation on the new domain. Most hosts offer one-click WordPress installation through cPanel or a similar control panel. Do not import any content yet at this stage.
Configure your hosting environment to match the old site as closely as possible:
- Same PHP version
- Same memory limit
- SSL certificate installed (your new domain must run on HTTPS)
Block the New Domain from Indexing
Before you migrate any content, temporarily block the new domain from search engines. Go to Settings, then Reading in WordPress, and check the box labeled “Discourage search engines from indexing this site.” This prevents Google from indexing partial content during the transition period. You will uncheck this after everything is in place.
Exporting and Importing Your Database and Files
Using a Plugin (Duplicator Example)
- Install Duplicator on your old site.
- Create a new package. Duplicator will scan your site and package everything into a zip archive plus an installer file called installer.php.
- Download both files to your computer.
- Create a fresh database on the new host and note the database name, username, and password.
- Upload the zip and installer.php to the root directory of your new domain via FTP.
- Visit yourdomain.com/installer.php in your browser.
- Enter the new database credentials and follow the on-screen steps.
- Duplicator will automatically run the search-replace on the database, swapping the old domain for the new one.
Manual Method via SSH and WP-CLI
If you prefer doing it by hand:
- Export your old database:
mysqldump -u username -p database_name > backup.sql - Copy your wp-content folder to the new server via FTP or rsync.
- Import the database on the new server:
mysql -u username -p new_database_name < backup.sql - Update wp-config.php on the new server with the correct database name, user, and password.
- Run the search-replace using WP-CLI (covered in the next section).
Search-Replace Old URLs in the Database
After importing the database, every internal link and stored reference still points to the old domain. You need to run a search-replace to update them.
WP-CLI provides the safest way to do this. SSH into your new server and run:
wp search-replace 'https://olddomain.com' 'https://newdomain.com' --skip-columns=guid --all-tablesThe --skip-columns=guid flag is important. The guid column in wp_posts stores the original post GUID and should generally not be changed, as WordPress uses it internally for syndication and feed identification. Changing it can cause issues with RSS feeds and duplicate content in feed readers.
After running the replace, regenerate your permalink structure:
wp rewrite flushThen clear all caches (object cache, page cache, any CDN caches).
Test the new site thoroughly before setting up any redirects on the old domain. Check:
- Homepage loads correctly
- Images display
- Internal links work
- Forms submit properly
- Admin dashboard is accessible
Setting Up 301 Redirects
This is the most SEO-critical step. Without 301 redirects, Google treats old URLs as dead pages and the new domain as a brand-new site. Every page on your old domain needs a 301 redirect pointing to the equivalent page on the new domain.
Method 1: .htaccess Rules
If your old site runs on Apache, add this to the .htaccess file on the old domain:
RewriteEngine On
RewriteCond %{HTTP_HOST} ^(www\.)?olddomain\.com$ [NC]
RewriteRule ^(.*)$ https://newdomain.com/$1 [R=301,L]
This rule catches every URL pattern on the old domain and redirects it to the matching path on the new domain, preserving the URL structure. Place this before any other RewriteRules in the file.
For Nginx, the equivalent directive in your server block is:
return 301 https://newdomain.com$request_uri;Method 2: Redirection Plugin (For When You Keep the Old WordPress Install Running)
If you plan to keep the old WordPress installation active for a period (for example, the old host contract runs for another few months), you can use the Redirection plugin. It provides a visual interface for managing 301 redirects and logs hits to each redirect, which helps you confirm that old URLs are being followed.
Install Redirection on the old site, then use the import feature to bulk-import your redirect map. Your redirect map is a CSV file with two columns: the old URL and the new destination URL. You built the list of old URLs in the pre-migration crawl step.
Verify Redirects Are Working
After setting up redirects, test a sample of URLs using a tool like httpstatus.io or the browser developer tools. Confirm each returns a 301 (not 302) status code. A 302 temporary redirect does not transfer link equity; only 301 permanent redirects do.
Once your 301 redirects are confirmed and your new site is indexed, you can also work on boosting the search visibility of pages on the new domain. Adding structured data is one effective tactic. See our guide on how to add schema markup to WordPress for rich search results to get started.
Updating Google Search Console
Use the Change of Address Tool
Google Search Console has a built-in Change of Address tool specifically for domain migrations. This is not optional. It tells Google’s crawlers to prioritize discovering and reindexing your content under the new domain, and it accelerates link equity transfer.
To use it:
- Log in to Google Search Console.
- Select the old domain property.
- Go to Settings (the gear icon in the left sidebar).
- Click “Change of address.”
- Select the new domain property from the dropdown. If it is not listed, you have not verified the new domain yet – do that first.
- Click Validate and Update.
Google recommends keeping 301 redirects in place for at least 180 days after using this tool. Many SEOs recommend keeping them permanent.
Verify the New Domain in GSC
The new domain needs to be a verified property in Google Search Console before the Change of Address tool will work. Use the DNS TXT record verification method if possible, as it is the most reliable. Your domain registrar’s DNS management panel is where you add the TXT record Google provides.
Updating Your Sitemap and Submitting to GSC
Generate a Fresh Sitemap
After migration, your SEO plugin (Rank Math, Yoast SEO, or similar) will generate a sitemap at newdomain.com/sitemap.xml or a similar path. Verify the sitemap exists and that all URLs in it point to the new domain, not the old one.
If you are using Rank Math, navigate to Rank Math, then Sitemap Settings, and click Regenerate Sitemap. For Yoast, the sitemap regenerates automatically when you flush rewrite rules.
Submit the New Sitemap to GSC
- In Google Search Console, select the new domain property.
- Click Sitemaps in the left sidebar.
- Enter the sitemap URL and click Submit.
This triggers Google to crawl the sitemap and schedule discovery of all listed URLs. You will see the sitemap status update to “Success” within a few hours if the file is accessible and correctly formatted.
Update Bing Webmaster Tools
Do not forget Bing. Submit the new sitemap in Bing Webmaster Tools as well. Bing does not have a Change of Address tool equivalent, so the 301 redirects and sitemap submission are the primary signals it uses.
Other Updates to Make Before Going Live
Beyond Google Search Console, there are several other places that need updating after a domain migration:
- Google Analytics: If using GA4, update the data stream URL. If using Universal Analytics still, create a new property for the new domain.
- Backlinks from your own properties: Update links on your social media profiles, email signatures, business listings, and any other sites you own.
- Email links: If any email campaigns, automations, or transactional emails contain old domain links, update them.
- Ad campaigns: Any Google Ads, Facebook Ads, or other paid campaigns pointing to the old domain need to be updated to the new one, or budget will land on pages that redirect.
- cdn and third-party integrations: CDN origin URLs, API webhook URLs, payment processor redirect URLs, and any third-party service that calls back to your domain need to be updated.
Monitoring Rankings for 30 Days Post-Migration
A domain migration is not finished when you hit publish. The post-migration monitoring period is where you catch problems before they become permanent.
Week 1: Crawl and Index Check
In the first week, focus on confirming that Google is finding and indexing the new domain. In Google Search Console on the new property, check the Coverage report daily. You should see “Valid” pages increasing as Google re-indexes your content.
Also check for any “Not Found” (404) errors appearing in the Coverage report. A spike in 404s on the new domain means some URLs are not being redirected correctly from the old domain, or there are broken internal links on the new site.
Week 2 to 4: Rankings and Traffic
From week two onwards, monitor your keyword rankings using whatever rank tracker you prefer (Ahrefs, SEMrush, Rank Tracker, or a free tool like Google Search Console’s Performance report). Compare against the baseline you documented before migration.
Expect some volatility. Rankings can swing up and down during the transition period. What you are watching for is:
- Rankings that were stable on the old domain but drop to zero on the new one (redirect may be missing)
- Traffic dropping to the new domain while old domain traffic also drops (double drop signals a redirect problem)
- Organic traffic on the new domain growing steadily week over week (healthy migration)
Check Old Domain Traffic in GSC
Keep an eye on the old domain property in Google Search Console as well. As the migration progresses correctly, you should see impressions and clicks on the old domain dropping toward zero. If the old domain continues showing healthy traffic for weeks, it may mean Google has not processed the Change of Address yet or the 301 redirects are not functioning correctly.
Common Mistakes That Damage Rankings
Using 302 Redirects Instead of 301
A 302 is a temporary redirect. It does not pass PageRank. If you set up 302 redirects by mistake, Google may continue indexing the old domain’s URLs while ignoring the new ones. Always verify your redirects return HTTP status 301.
Redirecting Everything to the Homepage
A common shortcut is to redirect all old URLs to the new domain’s homepage rather than to the equivalent new URL. Google calls this a “soft 404” and treats it similarly to a real 404. Link equity from backlinks to specific pages is lost. Every old URL needs to redirect to the corresponding new URL whenever possible.
Changing URL Structure at the Same Time as the Domain
Do not change your URL slug structure and your domain at the same time. This doubles the number of signals Google needs to process and amplifies ranking disruption. If you want to clean up your permalink structure, do it as a separate migration, at least three months before or after the domain change.
Skipping the GSC Change of Address Tool
Many site owners skip this because they think 301 redirects alone are enough. They are not. The Change of Address tool is the fastest way to tell Google the migration is intentional and accelerates the transfer. Use it.
Taking Down the Old Domain Too Quickly
If you take down the old domain before Google has finished transferring rankings, the redirects stop working and link equity transfer halts. Keep 301 redirects active for at least six months. A year is safer for sites with substantial backlink profiles.
Not Updating the Sitemap
Submitting an old sitemap full of old domain URLs to the new property in GSC sends conflicting signals. Always regenerate the sitemap after migration and confirm every URL in it uses the new domain.
Forgetting to Enable Indexing on the New Domain
It sounds obvious, but after a migration it is easy to forget to uncheck the “Discourage search engines” box in WordPress Settings. If you leave it checked, Google will not index the new site no matter how well your redirects are configured.
Quick Reference: Migration Checklist Summary
- Full backup completed and stored off-server
- Old site crawled, URL list exported
- Rankings and GSC data documented as baseline
- New domain registered and DNS propagated
- New domain verified in Google Search Console
- New WordPress installation set up with matching PHP and SSL
- Search engine indexing blocked on new domain during migration
- Database exported, imported, and search-replaced with new domain
- WP-CLI search-replace run, cache cleared
- New site tested thoroughly (links, images, forms, admin)
- 301 redirects configured on old domain (every URL, not just homepage)
- Redirects verified returning 301 status
- Indexing enabled on new domain
- GSC Change of Address tool completed
- New sitemap submitted to GSC and Bing Webmaster Tools
- Analytics, ads, and third-party integrations updated
- 30-day monitoring period underway
How Long Until Rankings Recover?
For a well-executed migration with proper 301 redirects and the Change of Address tool used, most sites see rankings stabilize within four to eight weeks. High-authority sites with clean redirects can recover faster. Smaller sites sometimes take twelve weeks or more.
If rankings have not recovered after three months and you have done everything correctly, look at these factors: are all old backlinks pointing to the correct new URLs via 301? Has Google finished crawling the old domain and processing the redirects? Are there any manual actions in GSC on either property?
Patience is part of the process. Keep the redirects in place, keep submitting updated sitemaps, and track your rankings weekly.
A domain migration done right is an investment. The temporary dip in rankings is the cost of a cleaner brand or a better domain. Follow every step in this guide and you give your site the best possible chance of carrying its existing rankings into the new home.