How to Set Up a Local WordPress Development Environment in 2026 (DDEV vs Local vs Docker)

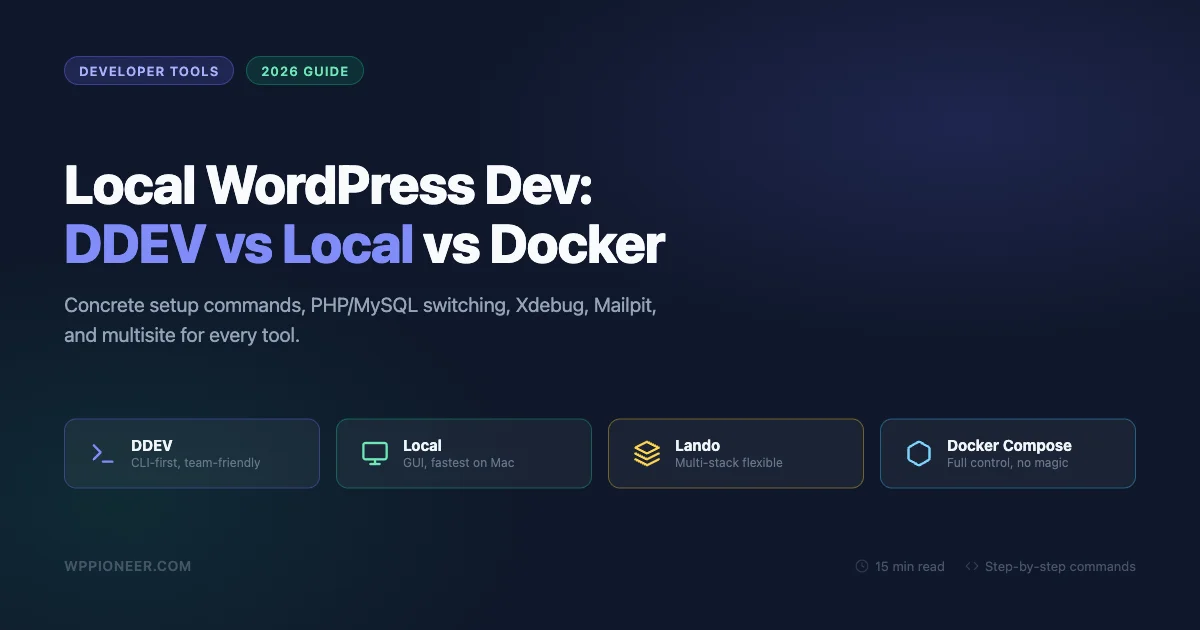
Setting up a local WordPress development environment used to mean downloading XAMPP, fighting PHP version conflicts, and praying your MySQL port wasn’t already in use. In 2026, you have four solid options that are actually pleasant to use: DDEV, Local by Flywheel, Lando, and raw Docker Compose. Each one takes a different approach to the same problem. This guide walks through all four with concrete commands, so you can pick the right one for your workflow rather than just the most popular one.
Why Local Development Matters (and Why the Old Way Was Painful)
Before comparing tools, it is worth understanding what you are actually solving. A local environment lets you build, break, and fix WordPress without touching a live server. You can experiment with plugins, test theme changes, debug PHP errors without any user seeing them, and commit your work to Git before it ever reaches production.
The old XAMPP/WAMP approach worked but required manual configuration every time your project changed. Need PHP 8.2 for one project and PHP 8.0 for another? Good luck managing that with a global XAMPP install. Need Xdebug? That meant editing php.ini files manually. Mailpit for catching outgoing email? Not a built-in concept.
Modern local development tools solve all of this with container-based isolation. Each project gets its own PHP version, MySQL version, web server config, and environment variables. Switching projects means switching directories, not reconfiguring your entire machine.
The Four Tools at a Glance
Here is a quick summary before we go deep on each one:
- DDEV – Docker-based, command-line focused, excellent for teams and CI/CD pipelines, strong plugin ecosystem
- Local by Flywheel – Desktop GUI, easiest onboarding, built for WordPress specifically, free tier available
- Lando – Docker-based, highly flexible, config-file driven, handles non-WordPress stacks too
- Raw Docker Compose – Full control, steeper learning curve, best for custom setups, no abstraction layer
DDEV: The Developer’s Developer Tool
What DDEV Is
DDEV is an open-source, container-based local development environment built on top of Docker. It was originally designed for Drupal and TYPO3 teams but has grown to be one of the most popular WordPress dev tools among experienced developers. It uses a YAML config file per project, which makes it easy to share environments across teams and check configs into version control.
Installing DDEV
On macOS with Homebrew:
brew install ddev/ddev/ddevOn Ubuntu/Debian Linux:
curl -fsSL https://ddev.com/install.sh | bashOn Windows with WSL2, DDEV runs inside your Linux subsystem. Install WSL2 first, then use the Linux install script above. You will also need Docker Desktop running in the background (or Orbstack on Mac if you prefer a lighter-weight Docker runtime).
Creating a WordPress Project with DDEV
mkdir my-wp-site && cd my-wp-site
ddev config --project-type=wordpress --docroot=. --project-name=my-wp-site
ddev start
ddev wp core download
ddev wp core install \
  --url=https://my-wp-site.ddev.site \
  --title="My WP Site" \
  --admin_user=admin \
  --admin_password=admin \
  [email protected]
DDEV automatically provisions an SSL certificate for the .ddev.site domain, so your local site runs on HTTPS out of the box. No hosts file editing required.
Switching PHP Versions in DDEV
ddev config --php-version 8.2
ddev restart
Supported versions as of 2026: PHP 7.4, 8.0, 8.1, 8.2, 8.3. The version is stored in .ddev/config.yaml, so it travels with your project repo.
Switching MySQL/MariaDB Versions
ddev config --database mysql:8.0
ddev restart
Or use MariaDB: ddev config --database mariadb:10.6. Changing the database version on an existing project requires exporting the database first: ddev export-db --file=/tmp/backup.sql, then restart, then import.
Enabling Xdebug in DDEV
ddev xdebug onThat is it. DDEV handles the php.ini configuration automatically. To use it in VS Code, install the PHP Debug extension and add a launch config pointing to port 9003. To turn Xdebug off when you do not need it (it slows page loads):
ddev xdebug offMailpit in DDEV
DDEV ships with Mailpit pre-configured. Every email WordPress tries to send gets caught and shown in the Mailpit web UI. Access it at:
ddev launch -mThis opens the Mailpit inbox in your browser. No extra plugin or configuration needed.
WordPress Multisite with DDEV
ddev wp core multisite-install \
  --url=https://my-wp-site.ddev.site \
  --title="My Network" \
  --admin_user=admin \
  --admin_password=admin \
  [email protected]

# For subdomain multisite, update .ddev/config.yaml:
# additional_fqdns: ["*.my-wp-site.ddev.site"]
ddev restart
Custom Domains in DDEV
Add custom domains by editing .ddev/config.yaml:
additional_fqdns:
  - mysite.local
  - store.mysite.local
Then run ddev restart. DDEV updates your hosts file automatically.
When to Choose DDEV
DDEV is the best choice when you work in a team and need reproducible environments. The config file commits to Git, and a new team member runs ddev start to get an identical setup. It is also the best option if you are building a CI pipeline, since DDEV works headlessly in GitHub Actions and similar environments. The trade-off is that you need to be comfortable with the command line.
Local by Flywheel: The Friendliest Option
What Local Is
Local (formerly Local by Flywheel) is a desktop application built specifically for WordPress development. It has a graphical interface, one-click site creation, and built-in tools for common workflows. WP Engine owns it, but it works with any WordPress host. The free version covers everything most developers need.
Installing Local
Download the installer from localwp.com for macOS, Windows, or Linux. Run the installer and open the application. No terminal required for basic setup.
Creating a WordPress Site in Local
Click the “+” button in the bottom left corner. Give your site a name, choose your environment (PHP version, web server, MySQL version), and click “Create Site.” Local downloads the WordPress files, configures the database, and sets up the site automatically. The whole process takes about 60 seconds on a fast connection.
PHP and MySQL Version Switching
Right-click any site and choose “Change PHP version” or “Change MySQL version.” Local will restart the environment with the new versions. This is the easiest version-switching experience of any tool on this list.
Xdebug in Local
Click the three-dot menu next to your site, then “Enable Xdebug.” Local configures everything automatically. It even shows a pop-up with the launch config you need in VS Code or PhpStorm. Disable it the same way when you are done debugging.
Mail Catching in Local
Local includes Mailpit (previously MailHog) built in. Open the Local app, click your site, and look for the “Mailpit” tab or the “Open Mailpit” button. All outgoing email from that WordPress install goes there automatically.
Multisite in Local
Local has a dedicated multisite option in the site creation wizard. Choose “Multisite” and pick between subdomain and subdirectory. Local handles the configuration and hosts file changes for you. Subdomain multisite requires the Pro version for wildcard domain support.
Performance Notes
Local runs on a technology called Lightning Services on macOS, which bypasses Docker entirely and runs PHP and MySQL directly. This makes it significantly faster than Docker-based tools on Mac. On Windows, Local uses Docker under the hood, so performance is similar to DDEV and Lando.
When to Choose Local
Local is the best choice for solo developers, designers, and anyone who prefers a GUI over the terminal. It is also the fastest to get started with, which makes it a great recommendation for clients or team members who are not primarily developers. The main limitation is that Local configs are not easily shareable via Git, so team environments can drift over time.
Lando: The Flexible All-Rounder
What Lando Is
Lando is a Docker-based local development tool with a focus on flexibility. It supports WordPress, Drupal, Laravel, Symfony, Node, and many other stacks from the same tool. Configuration lives in a .lando.yml file at the project root. It sits at a similar abstraction level to DDEV but with different defaults and a larger service ecosystem.
Installing Lando
Download the latest installer from docs.lando.dev. Lando requires Docker Desktop (or Orbstack on Mac). On macOS:
brew install --cask landoCreating a WordPress Site with Lando
Create a .lando.yml in your project directory:
name: my-wp-site
recipe: wordpress
config:
  webroot: .
  php: '8.2'
  database: mysql:8.0
  xdebug: true
Then run:
lando start
lando wp core download
lando wp core install \
  --url=http://my-wp-site.lndo.site \
  --title="My WP Site" \
  --admin_user=admin \
  --admin_password=admin \
  [email protected]
Lando automatically creates a .lndo.site domain with a self-signed certificate.
PHP and MySQL Version Switching in Lando
Edit .lando.yml and change the version numbers, then run lando rebuild. This is slightly slower than DDEV’s restart because Lando rebuilds containers from scratch, but it is just as predictable.
Mailpit in Lando
Lando does not include Mailpit by default, but adding it takes a few lines in .lando.yml:
services:
  mailpit:
    type: lando
    services:
      image: axllent/mailpit
      ports:
        - "8025:8025"
        - "1025:1025"
Then add an SMTP plugin in WordPress pointing to mailpit:1025.
Custom Domains in Lando
proxy:
  appserver:
    - mysite.lndo.site
    - store.mysite.lndo.site
Add those lines to .lando.yml and run lando rebuild.
When to Choose Lando
Lando is the best choice when your team works with multiple platforms. If you build WordPress sites but also maintain a Laravel API and a Node frontend, Lando handles all three with the same CLI pattern. It is also a good choice if you need more control over the Docker service configuration than DDEV exposes by default.
Raw Docker Compose: Maximum Control
What You Get (and What You Give Up)
Running WordPress in raw Docker Compose means no abstraction layer, no magic commands. You write the docker-compose.yml yourself, configure PHP via a custom Dockerfile if needed, and manage everything manually. This is more work upfront but gives you complete control over every layer.
A Production-Grade docker-compose.yml for WordPress
version: '3.8'

services:
  db:
    image: mysql:8.0
    restart: unless-stopped
    environment:
      MYSQL_ROOT_PASSWORD: rootpass
      MYSQL_DATABASE: wordpress
      MYSQL_USER: wpuser
      MYSQL_PASSWORD: wppass
    volumes:
      - db_data:/var/lib/mysql

  wordpress:
    image: wordpress:php8.2-apache
    restart: unless-stopped
    depends_on:
      - db
    ports:
      - "8080:80"
    environment:
      WORDPRESS_DB_HOST: db
      WORDPRESS_DB_USER: wpuser
      WORDPRESS_DB_PASSWORD: wppass
      WORDPRESS_DB_NAME: wordpress
      WORDPRESS_DEBUG: 'true'
    volumes:
      - ./wp-content:/var/www/html/wp-content
      - ./php.ini:/usr/local/etc/php/conf.d/custom.ini

  mailpit:
    image: axllent/mailpit
    ports:
      - "8025:8025"
      - "1025:1025"

volumes:
  db_data:
Start the stack with docker compose up -d. Access WordPress at http://localhost:8080 and Mailpit at http://localhost:8025.
Adding Xdebug to Docker Compose
Create a php.ini file alongside your docker-compose.yml:
[xdebug]
zend_extension=xdebug
xdebug.mode=debug
xdebug.start_with_request=yes
xdebug.client_host=host.docker.internal
xdebug.client_port=9003
The volume mount in the docker-compose.yml above loads this file automatically. Restart the stack after creating the file.
Switching PHP Versions in Docker Compose
Change the image tag in the wordpress: service. For PHP 8.3:
image: wordpress:php8.3-apacheThen run docker compose up -d --force-recreate wordpress.
Custom Domains with Docker Compose
Docker Compose does not manage your hosts file. You need to add entries manually:
sudo sh -c 'echo "127.0.0.1 mysite.local" >> /etc/hosts'For SSL, you can use a local reverse proxy like Traefik or Caddy. This adds complexity but gives you proper HTTPS locally.
When to Choose Raw Docker Compose
Choose Docker Compose when you need to match a production environment exactly, when you are building a custom hosting platform, or when the abstraction layers in DDEV and Lando are actively getting in your way. It is also the right choice for learning Docker itself, since you see every layer exposed. For pure WordPress development, it is usually more work than it is worth compared to DDEV or Local.
Head-to-Head Comparison
| Feature | DDEV | Local | Lando | Docker Compose |
|---|---|---|---|---|
| PHP version switching | One command | GUI click | Edit YAML + rebuild | Edit YAML + recreate |
| Xdebug setup | One command | GUI toggle | Config flag | Manual php.ini |
| Mailpit included | Yes | Yes | Manual service | Manual service |
| Team-shareable config | Yes (.yaml in Git) | Limited | Yes (.lando.yml) | Yes (docker-compose.yml) |
| Multisite support | Via WP-CLI | GUI wizard | Via WP-CLI | Manual |
| macOS performance | Good | Excellent | Good | Variable |
| Non-WordPress stacks | Partial | No | Yes | Yes |
| SSL out of the box | Yes | Yes | Self-signed | Manual |
| Learning curve | Medium | Low | Medium | High |
Performance Testing: Which Is Fastest?
On an M2 MacBook Pro, a fresh WordPress install with no plugins loads in roughly these times using curl -o /dev/null -s -w "%{time_total}":
- Local (Lightning Services): 40-80ms for a cached page load
- DDEV with Mutagen sync: 60-120ms
- Lando: 80-150ms
- Raw Docker Compose: 100-200ms (highly dependent on volume mount strategy)
The gap widens when you have large themes and many plugins. File system access through Docker volumes is the main bottleneck on macOS. DDEV uses Mutagen for file synchronization, which dramatically improves this. Local bypasses the Docker file system entirely on Mac, which is why it is the fastest.
On Linux, Docker uses native file system access, so all four tools perform similarly well.
Setting Up WP-CLI in Each Tool
WP-CLI is how you manage WordPress from the terminal: install plugins, run database operations, manage users, and more. Here is how to run WP-CLI commands in each tool:
# DDEV
ddev wp plugin install woocommerce --activate

# Local
# Use the "Open Site Shell" button in the GUI, then:
wp plugin install woocommerce --activate

# Lando
lando wp plugin install woocommerce --activate

# Raw Docker Compose
docker compose exec wordpress wp plugin install woocommerce --activate --allow-root
DDEV and Lando wrap WP-CLI as a built-in command. Local gives you shell access to the container. Docker Compose requires you to exec into the container each time unless you alias it.
If you are building or testing plugins, you will likely spend significant time running WP-CLI commands. Before you push updates to a live site, it helps to read the guide on safely updating WordPress plugins without breaking your live site so you understand the staging-to-production workflow.
Managing Multiple Projects
One of the biggest advantages of any Docker-based local tool is running multiple WordPress installs simultaneously without port conflicts.
With DDEV, each project gets its own subdomain under .ddev.site. You can have client-a.ddev.site, client-b.ddev.site, and my-plugin.ddev.site all running at the same time. Start and stop individual projects:
ddev start        # start current project
ddev stop         # stop current project
ddev stop --all   # stop everything
With Local, each site is listed in the GUI. Toggle sites on and off with a click. Local handles port management automatically.
With Lando, use lando start and lando stop per project directory. Unlike DDEV, all running Lando projects share some Docker resources, so running five at once uses more memory than DDEV’s approach.
Database Management
All four tools give you access to the WordPress database. Here are the options for each:
# DDEV: open Adminer in browser
ddev launch --phpmyadmin
# or use the DDEV database service directly:
ddev mysql

# Lando
lando phpmyadmin  # opens phpMyAdmin
# or direct access:
lando db

# Local: built-in Adminer in the GUI
# Click "Adminer" tab in the site details

# Docker Compose: connect your MySQL client to localhost:3306
# Or run phpMyAdmin as a service by adding it to docker-compose.yml
Exporting and Sharing Environments
When you want to pass a project to a colleague or deploy to staging, exporting the database and files is a standard step. Here are the key commands:
# DDEV: export database
ddev export-db --file=db-export.sql.gz

# Import on another machine (after ddev start):
ddev import-db --file=db-export.sql.gz

# Lando:
lando db-export db-export.sql.gz
lando db-import db-export.sql.gz
For Docker Compose:
docker compose exec db mysqldump -u wpuser -pwppass wordpress > db-export.sql
docker compose exec -T db mysql -u wpuser -pwppass wordpress < db-export.sql
When something goes wrong after importing or updating your environment, knowing how to recover is just as important as the setup. The guide on what to do when a WordPress update breaks your site covers the recovery steps you need for both local and live environments.
Which Tool Should You Choose?
Here is a straightforward decision tree:
Choose Local if: you are new to local development, you prefer GUIs over the terminal, you are working solo, or raw macOS speed matters to you. The onboarding is the smoothest and you can get a WordPress site running in under two minutes.
Choose DDEV if: you work in a team and need reproducible environments, you want your dev setup committed to Git alongside your code, or you use WP-CLI heavily. DDEV's one-command Xdebug toggle and built-in Mailpit make it the most complete CLI tool in this group.
Choose Lando if: your team works with multiple technology stacks, you need finer control over Docker service configuration than DDEV exposes, or you are already using Lando for non-WordPress projects.
Choose Docker Compose if: you need an exact mirror of a production Docker environment, you are building a custom platform, or you want to learn how the underlying container infrastructure works without any abstraction on top.
For most WordPress developers in 2026, the choice comes down to DDEV (CLI-first, team-friendly) versus Local (GUI-first, solo-friendly). Both are free, both are actively maintained, and both handle every major WordPress use case. Start with Local if you are not sure. You can always migrate to DDEV later when your workflow grows more complex.
Advanced Tips: Making Your Local Environment Work Like a Pro Setup
Use object caching locally
Redis and Memcached work locally just like they do on production servers. DDEV includes Redis as an optional service:
ddev get ddev/ddev-redis
ddev restart
Then install the Redis Object Cache plugin in WordPress and activate drop-in persistence. Testing your plugin or theme against a cached environment locally catches bugs that only appear on production, especially around cache invalidation and transients.
Mirror your production PHP config
Different PHP settings between local and production are a common source of "works on my machine" bugs. Copy your production php.ini values into a local override file. In DDEV, this goes in .ddev/php/my-php.ini. Common values to match:
memory_limit: set to match your host (128M, 256M, 512M)max_execution_time: 30 or 60 depending on your hostupload_max_filesizeandpost_max_size: match your host's limitserror_reporting: set to E_ALL locally to catch notices and warnings
Use Git for your wp-content directory only
Never put the entire WordPress core into version control. Your Git repo should track only what you own: wp-content/themes/your-theme/, wp-content/plugins/your-plugin/, and a composer.json or package.json for dependencies. A standard .gitignore for WordPress projects excludes:
/wp-admin/
/wp-includes/
/wp-content/uploads/
/wp-config.php
*.log
This keeps your repository small and avoids committing sensitive database credentials or user-generated content.
Set up automated database snapshots
Before testing a risky plugin update or data migration locally, snapshot your database. In DDEV:
ddev snapshot create --name=before-update
# ... run your tests ...
ddev snapshot restore before-update
This is faster than a full export/import cycle and gives you a quick rollback path during development.
Environment variables and wp-config.php
Avoid hard-coding credentials in wp-config.php. All four tools support environment variables that you can read in PHP. In DDEV, add to .ddev/config.yaml:
web_environment:
  - STRIPE_SECRET_KEY=sk_test_abc123
  - SENDGRID_API_KEY=SG.xyz
Then in wp-config.php:
define('STRIPE_SECRET_KEY', getenv('STRIPE_SECRET_KEY'));This pattern works identically in local, staging, and production environments when each has the appropriate env vars set.
Getting Your Workflow Production-Ready
A local environment is only useful if it connects to a reliable deployment process. Once you are comfortable with your chosen tool, the next step is establishing a staging-to-production workflow: test locally, push to a staging URL, review, then deploy. All four tools make this easier because your database exports and file syncs are standardized.
Whatever tool you pick, keep Xdebug off by default and only enable it when you are actively debugging. Keep Mailpit running so you catch all outgoing email during development. Use WP-CLI for anything repetitive. And keep your wp-content directory under version control, separate from WordPress core files.
A well-configured local environment is the foundation that makes everything else in WordPress development faster, safer, and less stressful. It is the single best investment you can make in your workflow, and with any of the four tools in this guide, you can have a fully working WordPress stack running in under five minutes.