Google Search Console for WordPress: The Essential Setup and Indexing Fix Guide

Google Search Console is free, it shows you exactly which queries bring people to your site, and it tells you when Google can’t crawl your pages. Despite all that, most WordPress site owners either haven’t connected it or check it once and never return. This guide walks through setup, the tools you’ll actually use, and the indexing issues you’re most likely to encounter.
What Google Search Console Actually Shows You
Before setup, it’s worth knowing why you need it. GSC gives you data you cannot get anywhere else:
- Search Performance: Which queries people type before clicking to your site, how often your pages appear, what position they rank at, and click-through rate by query and page.
- Index Coverage: Which pages Google has indexed, which are excluded and why, and any crawl errors.
- URL Inspection: Test any specific URL to see how Google sees it, when it was last crawled, and whether it’s indexed.
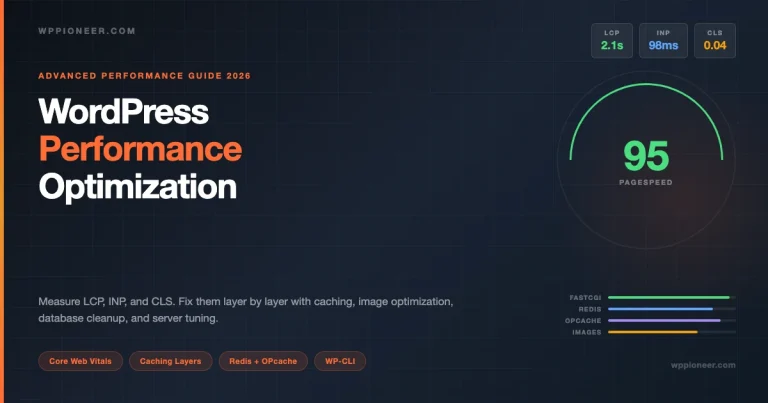
- Core Web Vitals: LCP, INP, and CLS data from real Chrome users, separated by mobile and desktop.
- Manual Actions: If Google penalizes your site for spam, unnatural links, or thin content, it appears here.
- Sitemaps: Submit and monitor your XML sitemap.
Step 1: Add Your Site to Search Console
- Go to search.google.com/search-console/welcome and sign in with your Google account.
- Click Add Property.
- Choose your property type:
| Property Type | Covers | Best For |
|---|---|---|
| Domain property | All URLs, all protocols, all subdomains | Most sites (recommended) |
| URL-prefix property | Only URLs starting with that prefix | Tracking a specific subdirectory |
Use the Domain property for most sites. It’s simpler to manage and covers everything.
Step 2: Verify Ownership
Google needs to confirm you own the site before showing you the data. There are several verification methods. The recommended ones for WordPress:
Method A: DNS TXT Record (Domain Properties)
For domain properties, DNS verification is the only option. Google gives you a TXT record to add to your DNS zone. This looks like google-site-verification=xxxxxxxx. Add it at your domain registrar or DNS provider (Cloudflare, GoDaddy, Namecheap, etc.). Verification takes a few minutes to a few hours depending on your DNS TTL.
Method B: HTML Tag (URL-Prefix Properties)
For URL-prefix properties, the HTML tag method is the fastest if you’re using an SEO plugin:
- Copy the meta tag from GSC (looks like
<meta name="google-site-verification" content="xxxxxxxx" />). - In RankMath: Go to RankMath > General Settings > Webmaster Tools and paste the verification code (just the content value, not the full tag).
- In Yoast: Go to Yoast SEO > General > Site Connections and paste into the Google field.
- Click Verify in GSC. Verification is instant if the tag is live.
Method C: Google Analytics (If Already Configured)
If your site has Google Analytics 4 already set up with the same Google account, GSC can verify via your GA4 tag. This is the zero-config option: no DNS changes, no plugin settings.
Step 3: Submit Your Sitemap
A sitemap tells Google which pages exist and when they were last updated. Submit it immediately after verifying your site.
- In GSC, go to Indexing > Sitemaps.
- Enter your sitemap URL. RankMath generates it at
https://yoursite.com/sitemap_index.xml. Yoast generates it athttps://yoursite.com/sitemap_index.xml(same format). - Click Submit. GSC will show the number of URLs found after it processes the sitemap (usually within 24 hours).
If you’re not sure of your sitemap URL, go to https://yoursite.com/sitemap_index.xml in your browser. If it loads a list of sitemaps, that’s the URL. If it shows a 404, check that your SEO plugin is active and sitemaps are enabled.
Understanding the Coverage Report
Go to Indexing > Pages. This shows every URL Google has processed for your site, grouped by status:
- Indexed: Google has indexed these pages. They can appear in search results.
- Not indexed: Google decided not to index these, or hasn’t gotten to them yet. The reason is listed for each page.
- Crawled, not indexed: Google visited the page but decided it wasn’t worth indexing (often thin content, duplicate, or near-duplicate pages).
Common “Not Indexed” Reasons and Fixes
| Reason | What it means | Fix |
|---|---|---|
| Excluded by noindex tag | Page has a noindex meta tag | Check SEO plugin settings for that page; remove noindex if unintentional |
| Crawled, not indexed | Thin or duplicate content | Improve content length and uniqueness, or add canonical to the preferred version |
| Discovered, not crawled | Google found it but hasn’t visited yet | Submit via URL Inspection; check crawl budget (common on large sites) |
| Blocked by robots.txt | Your robots.txt prevents crawling | Check robots.txt at yourdomain.com/robots.txt, remove block if wrong |
| Redirect error | Redirect chain is broken | Fix the redirect chain using a redirect checker tool |
| Page with redirect | URL redirects to another URL | If intentional, no action needed; verify redirect destination is indexed |
Using the URL Inspection Tool
The URL Inspection tool is one of GSC’s most useful features. For any specific page on your site, it tells you:
- Whether the URL is indexed
- The last crawl date and time
- The canonical URL Google uses for the page
- How Googlebot renders the page (you can see a screenshot)
- Any crawl or indexing errors on that specific page
To use it: paste any page URL into the search bar at the top of GSC. The tool runs in real-time and shows current status.
Requesting Indexing for New Posts
After publishing a new post, paste the URL into the URL Inspection tool and click Request Indexing. Google will add it to the priority crawl queue. This doesn’t guarantee indexing (Google decides based on the page’s quality), but it speeds up the process from days to hours for most pages.
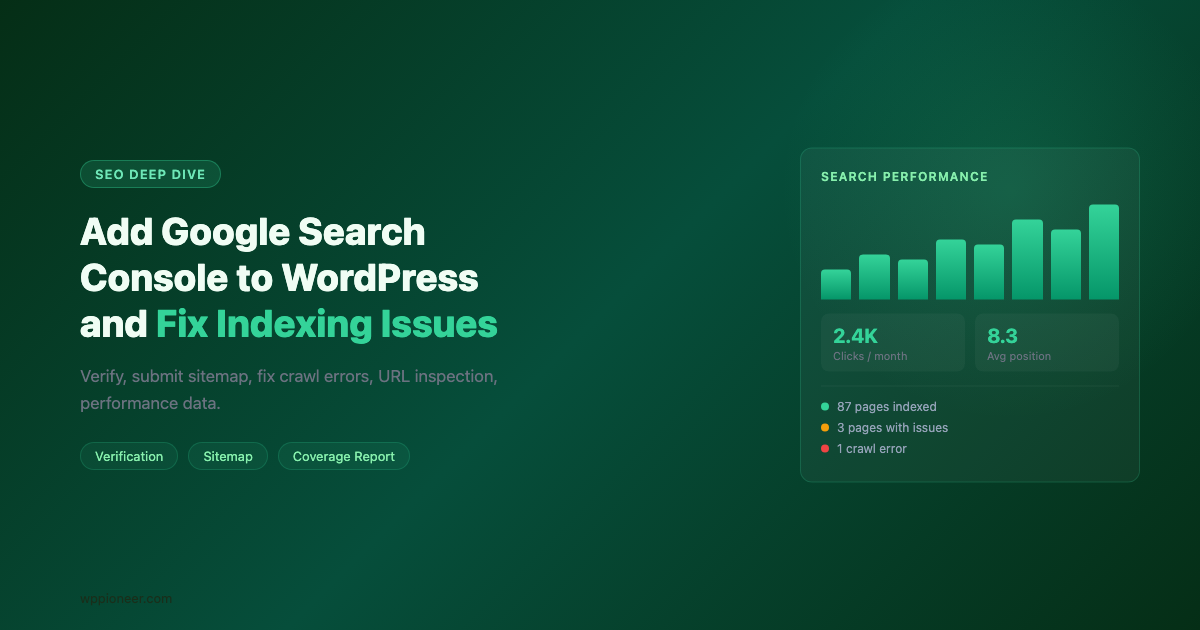
Reading the Search Performance Report
Go to Performance > Search Results. This is the data most site owners come to GSC for. The top section shows aggregate clicks, impressions, click-through rate (CTR), and average position over the selected date range.
The Queries Tab
The Queries tab shows which search terms brought people to your site. Sort by Impressions to see what queries your site appears for even when people don’t click. High impressions + low CTR means your titles and descriptions aren’t compelling enough for those queries.
The Pages Tab
Switch to the Pages tab to see which specific posts and pages drive the most clicks. Sort by Impressions to find pages that rank but don’t convert to clicks. These are candidates for title tag and meta description improvement.
Position 5-20: Quick Wins
Filter the Queries tab to positions 5-20 with high impressions. These queries rank near the first page but haven’t broken into the top positions. Improving the content for these queries (adding more depth, improving structure, targeting related keywords) can move them from position 8 to position 3, roughly tripling their click volume.
Pages ranking in positions 5-15 with over 500 monthly impressions are the best investment for content improvements. They’re already competitive enough to rank; they just need a push.
Checking for Manual Actions and Security Issues
Go to Security and Manual Actions. This section is usually empty, and you want it to stay that way. If there’s an entry here, Google has detected either a manual penalty from a reviewer or a security issue (malware, hacked content).
Manual actions happen for:
- Unnatural inbound links pointing to your site
- Thin or generated content
- Hidden text or keyword stuffing
- User-generated spam in comments or profile pages
If you have a manual action, the GSC report explains the reason and links to Google’s documentation for resolving it. After fixing the issue, submit a reconsideration request through the same interface.
Core Web Vitals in GSC
Go to Experience > Core Web Vitals. This report shows field data from real Chrome users, grouped by Largest Contentful Paint (LCP), Interaction to Next Paint (INP), and Cumulative Layout Shift (CLS).
Pages are labeled Good, Needs Improvement, or Poor. Click any URL group to see specific pages and the metric that’s failing. The URL Inspection tool’s live test can show what’s causing the issue on individual pages.
For most WordPress sites, LCP failures are caused by unoptimized images or slow hosting, and CLS failures come from images without explicit dimensions or ads that load after content.
Filtering CWV Data by Device
The Core Web Vitals report splits data between mobile and desktop. Mobile scores matter most because of Google’s mobile-first indexing. If your mobile LCP is Poor but desktop is Good, focus on image optimization and server response time (the two biggest mobile LCP factors for WordPress sites) before worrying about JavaScript performance.
Connecting GSC to Google Analytics 4
GSC data and GA4 data are most useful together. You can connect them so GA4 shows GSC search query data alongside behavioral data (time on page, bounce rate, conversions). To connect:
- In GA4, go to Admin > Property Settings > Product Links > Search Console Links.
- Click Link and select your GSC property.
- Once linked, GSC data appears in GA4 under Reports > Acquisition > Search Console.
This connection lets you see which search queries lead to conversions (not just clicks), which is the data gap that GSC alone can’t fill. A query with high click volume but zero conversions is a different priority than one with lower volume but high conversion rate.
Building a Monthly GSC Review Routine
GSC is most useful when you look at it regularly. A 15-minute monthly review covers:
- Check Performance for clicks and impressions trend vs. previous month
- Open Indexing > Pages and look for new “Not indexed” errors
- Check Security and Manual Actions (should be empty)
- Open Core Web Vitals and check for new Poor URLs
- In Queries, filter for positions 5-15, find any high-impression pages that dropped
This routine takes 15 minutes and catches issues (crawl errors, indexing drops, manual actions) before they compound into traffic losses.
Using GSC for Content Refresh Decisions
GSC is the best tool for deciding which existing posts to update. The “declining pages” pattern – posts where impressions and clicks are trending downward over 90 days – identifies content that Google is demoting, usually because fresher or more comprehensive content has appeared from competitors.
To find declining pages in GSC:
- Go to Performance > Search Results.
- Set the date range to the last 90 days, then add a comparison to the previous 90 days.
- Switch to the Pages tab and sort by Click Difference (most negative first).
- Pages with significant negative click differences and high impression counts are your priority refresh targets.
Before refreshing a declining page, click through to see which queries it ranks for. If the page is ranking for queries it wasn’t originally written for, a targeted update to cover those queries more directly can arrest the decline.
Rich Results and Search Appearance
GSC’s Search Appearance section shows whether your pages are generating rich results (structured data). For WordPress sites using RankMath or Yoast with schema markup enabled, you’ll see rich result counts for articles, FAQs, breadcrumbs, and how-to guides.
Click any rich result type to see which pages have valid schema and which have errors. Schema errors don’t prevent pages from appearing in search, but they prevent the rich result enhancement (the star ratings, FAQ dropdowns, etc.) from appearing in the SERP. Fix errors reported here by adjusting your schema configuration in your SEO plugin.
International Targeting Settings
If your WordPress site targets a specific country, configure the International Targeting setting in GSC under Legacy Tools and Reports. This signals to Google which country your site primarily serves, which can improve rankings for location-specific queries even if your hosting server is elsewhere.
For hreflang configurations (sites with multiple language/region versions), GSC’s International Targeting section also shows errors in your hreflang tags. Hreflang errors are common and easy to introduce when using translation plugins, so checking this report periodically is worthwhile for multilingual WordPress sites.
One underused GSC feature for WordPress sites is the Links report under Links in the left sidebar. This shows which external sites link to your content (inbound links) and which of your pages attract the most links. For link building outreach, the top linked pages tell you what content in your niche earns natural links, which informs the type of content worth creating more of. Clicking into any linked page shows the specific anchor text used by external sites, which reveals how other sites are describing your content to their readers.
GSC data is most useful when your on-page fundamentals are already solid. Our guide on how to implement WordPress SEO basics without relying on plugins covers title tag structure, internal linking patterns, and schema markup that GSC can then confirm is working.