
Your WordPress site starts hitting 10,000 pageviews a day and suddenly the database becomes the bottleneck. Every visitor triggers PHP, which fires MySQL queries, which return the same data that was returned for the previous 500 visitors. Redis object cache breaks that cycle by storing query results in memory so PHP can grab them in under a millisecond instead of waiting on a disk-backed database. This guide walks you through the full setup: installing Redis on Ubuntu, cPanel, and managed hosts; configuring the WordPress drop-in; tuning memory and eviction policy; and reading the monitoring numbers that tell you whether it is actually working.
Why Object Caching Matters at 10,000+ Pageviews a Day
WordPress has three layers of caching that most people confuse. Page caching saves the finished HTML for anonymous visitors. Transient caching stores arbitrary data in the database. Object caching stores PHP objects and query results in a fast key-value store so they survive across multiple requests within a page load.
Without an object cache backend, WordPress re-runs wp_cache_set() and wp_cache_get() calls against a PHP array that only lives for one request. Every single page load queries the database for things like navigation menus, widget data, user meta, and option rows. At 10,000 pageviews a day you are running those queries roughly 300 times per minute. At 100,000 pageviews a day that becomes 3,000 times per minute.
Redis solves this by being the persistent store behind those cache calls. Once a query result is stored, it stays in memory across requests until you explicitly flush it, it expires, or Redis evicts it due to memory pressure. Sites commonly see database query counts drop by 60 to 80 percent after enabling Redis object cache.
The performance post on why your WordPress admin is slow covers the full picture of database overhead, including autoloaded options and heartbeat API load. Redis tackles the object query layer specifically.
Redis vs Memcached vs APCu: Which One to Choose
Three object cache backends see real-world WordPress use. Here is how they compare for a production site.
Redis supports persistence, data structures, and clustering. You can configure it to write to disk so cache survives a server restart. It supports tagging, which the Redis Object Cache plugin uses for granular cache invalidation. It runs as a standalone daemon on port 6379 by default and can be shared across multiple PHP workers and multiple WordPress installs.
Memcached is simpler and slightly faster for pure read workloads, but it stores nothing to disk. A restart wipes the entire cache. It also lacks native support for cache tagging, which matters when you need to invalidate all cache entries related to a specific post. Most managed hosts that offer object caching have moved toward Redis over the past several years.
APCu lives in the PHP process itself. It is fast and zero-configuration, but each PHP-FPM worker gets its own cache pool. On a server running 8 workers you get 8 isolated caches that cannot share data. APCu works reasonably well on low-traffic single-server setups but does not scale horizontally.
For any site past 10,000 pageviews a day, Redis is the right choice. The rest of this guide assumes Redis.
Installing Redis on Ubuntu (Self-Managed VPS or Dedicated Server)
These steps work on Ubuntu 20.04, 22.04, and 24.04.
First, update your package list and install the Redis server:
sudo apt update
sudo apt install redis-server -y
Open the Redis configuration file:
sudo nano /etc/redis/redis.confFind the supervised directive and set it to systemd so the service integrates cleanly with Ubuntu’s init system:
supervised systemdWhile you are in the config file, set a memory limit. A reasonable starting point for a WordPress site is 256 megabytes:
maxmemory 256mb
maxmemory-policy allkeys-lru
The allkeys-lru policy tells Redis to evict the least recently used keys when memory is full. This is the correct policy for a cache workload where you want the most-accessed data to stay in memory. More on eviction policies later in this guide.
Save the file and restart Redis:
sudo systemctl restart redis-server
sudo systemctl enable redis-server
Test that Redis is running:
redis-cli pingYou should see PONG. If you see a connection error, check whether the Redis service started:
sudo systemctl status redis-serverBy default Redis listens on 127.0.0.1:6379 and is not exposed to the public internet. Keep it that way. WordPress and Redis should communicate over the Unix socket or localhost, never over a public IP.
Using a Unix Socket Instead of TCP
For a single-server setup, connecting over a Unix socket is faster than TCP because it skips the network stack entirely. Add these lines to /etc/redis/redis.conf:
unixsocket /var/run/redis/redis.sock
unixsocketperm 770
Add the web server user to the redis group so PHP can write to the socket:
sudo usermod -aG redis www-dataRestart Redis and note the socket path. You will use it when configuring wp-config.php.
Installing Redis on cPanel Shared Hosting
If your host runs cPanel, the path depends on whether Redis is available at the server level. Ask your host directly. Many managed cPanel providers (SiteGround, Hostinger, Kinsta, WP Engine) offer Redis as an add-on or have it enabled by default.
On WHM/cPanel servers where Redis is installed server-wide, the host typically exposes a socket path per cPanel account or provides a shared 127.0.0.1:6379 endpoint. Your hosting control panel may show a “Redis” or “Object Cache” toggle in the performance section.
If your cPanel host does not offer Redis, you have two options:
- Switch to a host that does. Most modern managed WordPress hosts include Redis in their mid-tier plans.
- Fall back to APCu using the WP_CACHE_KEY_SALT technique described in the APCu section below.
Do not attempt to compile or run Redis in your cPanel home directory. It is technically possible but the process is fragile and most shared hosts will kill long-running processes.
Installing Redis on Managed WordPress Hosts
Here is what the setup looks like on the most common managed WordPress platforms:
Kinsta: Go to your site dashboard, click the “Redis” option in the sidebar, and enable it. Kinsta provisions a dedicated Redis instance per site. No wp-config.php changes needed; their mu-plugin handles the connection automatically.
WP Engine: Redis object cache is available on Growth plans and above. Enable it from the “Performance” tab in your site portal. WP Engine injects the connection constants automatically.
Cloudways: Click on your server, go to the “Manage Services” section, and toggle Redis on. Then configure the Redis Object Cache plugin manually (covered in the next section).
Flywheel / Local: Redis is not available on Flywheel’s shared plans. Use APCu or upgrade to a dedicated plan.
The key question to ask any managed host is: “Do you inject the Redis connection constants into wp-config.php, or do I need to add them myself?” Most managed hosts handle it, but some expect you to configure the plugin.
Installing the Redis Object Cache Plugin
The Redis Object Cache plugin by Till Krüss is the standard choice. Install it from Plugins > Add New in your WordPress dashboard, or via WP-CLI:
wp plugin install redis-cache --activateAfter activation, go to Settings > Redis. You will see the connection status. If Redis is running on the default 127.0.0.1:6379 with no password, the plugin connects automatically.
If you configured a Unix socket, add these constants to wp-config.php before the /* That's all, stop editing! */ line:
define( 'WP_REDIS_SCHEME', 'unix' );
define( 'WP_REDIS_PATH', '/var/run/redis/redis.sock' );
For TCP with a password:
define( 'WP_REDIS_HOST', '127.0.0.1' );
define( 'WP_REDIS_PORT', 6379 );
define( 'WP_REDIS_PASSWORD', 'your-redis-password' );
define( 'WP_REDIS_DATABASE', 0 );
If you run multiple WordPress installs on the same Redis server, set a unique prefix per site to prevent cache collisions:
define( 'WP_REDIS_PREFIX', 'mysite_' );Enabling the Drop-In: What object-cache.php Does
The Redis Object Cache plugin works by installing a drop-in file named object-cache.php in your wp-content directory. This file replaces WordPress’s default non-persistent cache implementation.
From the Settings > Redis screen, click Enable Object Cache. The plugin copies its drop-in to wp-content/object-cache.php.
You can also do this via WP-CLI:
wp redis enableTo verify the drop-in is active:
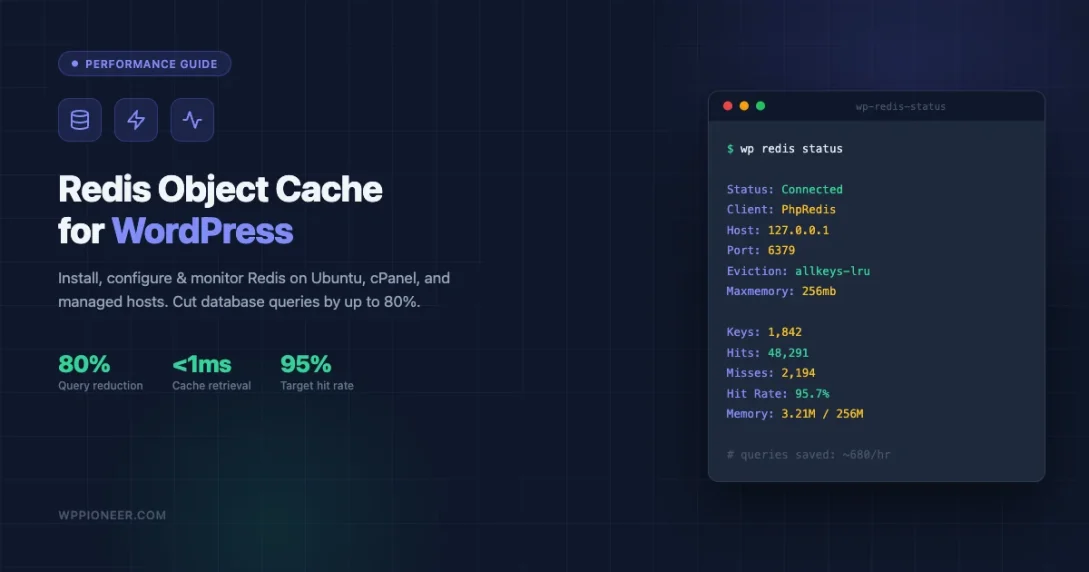
wp redis statusA healthy output looks like this:
Status:    Connected
Client:    PhpRedis
Host:      127.0.0.1
Port:      6379
Auth:      no
Database:  0
Prefix:    none
Timeout:   1.0 second
Read timeout: 1.0 second

Keys:      1,204
Used memory: 3.21M
The Status: Connected line is what matters. If you see Status: Not connected, check that Redis is running (sudo systemctl status redis-server) and that the constants in wp-config.php match your actual Redis configuration.
Configuring wp_cache_* Groups
WordPress organizes cached data into groups. The core groups include posts, terms, users, options, and about a dozen others. You can mark specific groups as global (shared across a multisite network) or non-persistent (never written to the external cache).
For most single-site installs, the defaults are fine. But if you use WooCommerce, you want to be aware that session data and cart data can generate thousands of cache keys. The Redis Object Cache plugin handles this gracefully, but you may want to exclude certain groups from being cached:
define( 'WP_REDIS_IGNORED_GROUPS', ['counts', 'plugins'] );For multisite setups, global groups share cache keys across all sites. The plugin sets these automatically for the standard WordPress multisite groups. You do not need to configure this manually unless you are building a custom plugin that registers its own cache groups.
Choosing the Right Eviction Policy
Redis eviction policy controls what happens when Redis runs out of memory. The wrong policy can cause either silent cache failures or Redis errors that bring down your site.
The policies relevant to WordPress object cache:
allkeys-lru (recommended for WordPress): Evicts the least recently used key from the entire keyspace when memory is full. This means Redis always accepts new writes by making room. Your cache hit rate may drop slightly under memory pressure, but Redis never returns an error for a write operation. This is the correct policy for a cache workload.
volatile-lru: Only evicts keys that have an expiration set. If your keys do not have TTLs, Redis will refuse new writes with an OOM error when memory is full. WordPress core does not always set TTLs on cache keys, so this policy is a poor fit for most WordPress setups.
noeviction (the Redis default): Returns an error when memory is full and a write is attempted. Under traffic spikes this causes PHP errors. Do not use this for WordPress object cache.
allkeys-lfu: Evicts the least frequently used key. Useful when some data is accessed constantly and other data is rarely touched. Can outperform LRU on sites with very stable hot data, but LRU is simpler and works well for most WordPress patterns.
Set the eviction policy in /etc/redis/redis.conf:
maxmemory-policy allkeys-lruOr set it at runtime without restarting Redis:
redis-cli config set maxmemory-policy allkeys-lruPersistent Storage vs In-Memory Only
By default Redis is an in-memory store. A server restart wipes all keys. For a pure cache use case, this is acceptable. When Redis restarts, WordPress simply re-populates the cache from the database on the next few requests.
Redis supports two persistence modes:
RDB (point-in-time snapshots): Redis writes a binary snapshot of the dataset to disk at configurable intervals. On restart, it loads this snapshot. Enable it in redis.conf:
save 900 1
save 300 10
save 60 10000
This means: save if at least 1 key changed in 900 seconds, or 10 keys changed in 300 seconds, or 10,000 keys changed in 60 seconds.
AOF (Append Only File): Redis logs every write operation. On restart, it replays the log to reconstruct the dataset. More durable than RDB but generates more disk I/O.
For WordPress object cache, persistence is optional. The cache is populated from the database, so a cold cache after a restart causes a brief performance dip, not data loss. On most setups, running Redis in pure in-memory mode (no persistence) is simpler and reduces disk I/O. The only time persistence matters for a WordPress cache is if your Redis instance is also storing session data or application state that cannot be reconstructed from the database.
Monitoring Memory Usage and Hit Rate
Once Redis is running, check these numbers regularly:
Hit rate is the percentage of cache lookups that find a cached value. Run:
redis-cli info stats | grep -E 'keyspace_hits|keyspace_misses'Calculate hit rate as hits / (hits + misses). A healthy WordPress Redis cache runs at 85 to 95 percent hit rate after the first few minutes of warm-up. If your hit rate is below 70 percent, either your TTLs are too short or your maxmemory is too small and Redis is evicting frequently.
Memory usage:
redis-cli info memory | grep -E 'used_memory_human|maxmemory_human'If used_memory is consistently close to maxmemory, increase the limit or review what is being cached. Use redis-cli --bigkeys to find the largest keys consuming memory.
Key count:
redis-cli dbsizeA typical WordPress site with Redis object cache holds between 500 and 5,000 keys depending on content volume. Sites with thousands of posts, users, or WooCommerce products hold more.
Evictions:
redis-cli info stats | grep evicted_keysNon-zero evictions mean Redis is running out of memory and discarding keys. This is not an error with allkeys-lru, but if evictions are high relative to your total key count, you should increase maxmemory.
The Redis Object Cache plugin dashboard in Settings > Redis also shows hits, misses, and connection latency in the WordPress admin. Check it after enabling the cache to confirm the numbers look right.
Observing the Query Reduction
The most direct way to see the impact of Redis is to compare database query counts before and after. Install Query Monitor (free, in the WordPress plugin repository) and load a page while logged out. Query Monitor shows the number of database queries, total query time, and which queries ran.
On a typical WordPress site without object cache, a homepage might run 20 to 40 database queries. With Redis object cache fully warm, that same homepage typically runs 4 to 8 queries. The queries that disappear are repeated lookups for options rows, user capabilities, navigation menus, sidebar widgets, and term data. These are exactly the things that change rarely but get fetched on every page load.
The related guide on how to speed up your WordPress site covers the full stack from image compression to CDN, but object caching is the single change that has the highest impact on database load at scale.
Fallback to APCu When Redis Is Not Available
Some shared hosts do not offer Redis. APCu is the next best option. Install the APCu PHP extension (ask your host or check your PHP extensions panel) and then install the APCu Object Cache Backend plugin.
The plugin installs wp-content/object-cache.php pointing to APCu instead of Redis. The WordPress cache API calls work identically from the application layer.
The limitation is that APCu cache is per PHP-FPM worker and does not persist across workers. On high-traffic sites with many PHP workers, you get reduced cache efficiency because workers cannot share cached data. APCu also does not survive PHP-FPM restarts.
If APCu is not available either, you can use Memcached. The Memcached Object Cache plugin works the same way. Memcached is a valid fallback but lacks the persistence and tagging features of Redis.
In practice, if a host offers none of these options, the site is being hosted on infrastructure that cannot support 10,000 pageviews a day without a page cache layer absorbing all anonymous traffic. Consider adding a full-page cache like WP Rocket or W3 Total Cache to reduce the number of PHP executions that reach the object cache layer at all. Pairing object cache with image compression and a CDN gives you the full performance stack most high-traffic WordPress sites rely on.
Common Setup Mistakes and How to Fix Them
object-cache.php not installed: Installing the Redis Object Cache plugin does not automatically enable the drop-in. You must click “Enable Object Cache” in Settings > Redis, or run wp redis enable. Without the drop-in file, WordPress ignores Redis entirely.
Wrong socket path: If you configured Redis to use a Unix socket but the path in wp-config.php does not match the actual socket file, you get connection errors. Run redis-cli -s /var/run/redis/redis.sock ping to test the socket directly.
Multiple sites sharing a prefix collision: If you run two WordPress installs on the same Redis instance and forget to set WP_REDIS_PREFIX per site, they share cache keys. This means site A might serve cached data from site B. Always set a unique prefix.
Redis password not set but required: Some managed Redis setups require authentication. If you leave the password constant blank and Redis requires one, you will see authentication errors in the WordPress debug log. Check wp-content/debug.log for Redis connection errors.
Maxmemory too small: Setting maxmemory to 64MB on a site with 5,000 posts means Redis constantly evicts keys and your hit rate stays below 50 percent. Start at 256MB and monitor usage for a week. Increase if used_memory is consistently above 80 percent of maxmemory.
noeviction policy left as default: If you installed Redis without changing the eviction policy, it defaults to noeviction. Under traffic spikes this causes write errors that surface as PHP notices or broken cache calls. Always set allkeys-lru explicitly.
Verifying the Setup End-to-End
Run through this checklist after completing your setup:
- Run
wp redis statusand confirm Status is Connected. - Load your homepage twice. On the second load, check Query Monitor and confirm query count dropped.
- Run
redis-cli info stats | grep keyspace_hitsand confirm the hits counter is increasing. - Run
redis-cli info memoryand confirm used_memory is well below maxmemory. - Run
redis-cli config get maxmemory-policyand confirm allkeys-lru is set. - Check
wp-content/debug.logfor any Redis connection errors. - If you use WP_REDIS_PREFIX, run
redis-cli keys 'yourprefix*' | head -20to confirm keys are being prefixed correctly.
Once all seven checks pass, your Redis object cache is running correctly. The performance benefit compounds over time as the cache warms up with real traffic patterns. Most sites see the full benefit within 30 minutes of enabling the cache under normal traffic load.
What to Do When Redis Goes Down
Redis is generally very stable, but servers get restarted and processes crash. The Redis Object Cache plugin handles this gracefully by design. When the connection to Redis is unavailable, WordPress falls back to the default non-persistent PHP array cache for the duration of that request. Your site stays up and pages still load. They just run more database queries until Redis comes back online.
You can confirm this fallback behavior by stopping Redis temporarily and checking that your site still loads without errors:
sudo systemctl stop redis-server
# Verify site loads
sudo systemctl start redis-server
The plugin also supports a timeout setting. If Redis takes longer than the configured timeout to respond, WordPress skips the cache for that request rather than waiting. The default timeout is 1 second. You can adjust it in wp-config.php:
define( 'WP_REDIS_TIMEOUT', 1 );
define( 'WP_REDIS_READ_TIMEOUT', 1 );
Keep the timeout short. A slow Redis response that hangs for 5 seconds hurts page load times more than simply bypassing the cache entirely. If you find Redis timeouts happening frequently, investigate whether the Redis server has resource constraints or network latency issues rather than increasing the timeout value.
Set up a simple cron alert to notify you if Redis is not responding:
*/5 * * * * redis-cli ping > /dev/null 2>&1 || echo "Redis down at $(date)" | mail -s "Redis alert" [email protected]On managed hosts, the host’s monitoring typically handles Redis availability alerts. Check whether your hosting dashboard has an alert configuration for the Redis service.
Caching Plugins Essential WordPress settings Object Cache Redis Cache WP Performance Optimization
Last modified: May 8, 2026


")


")
")


")


Beginner’s Guide • How-To Guides • Site Maintenance Basics
April 29, 2026 • Views: 4
How to Moderate WordPress Comments Without Checking Them Every Day